Ruffle Butt Onesie

(Originally posted on UCreate)
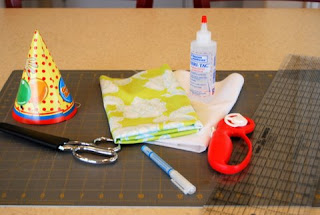
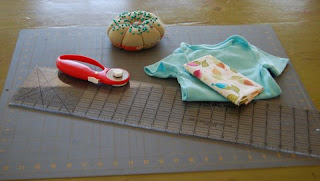
Supplies:

  • Baby bodysuit
  • Fabric
  • Pins
  • Rotary cutter and mat or scissors
  • Sewing machine
  • Serger (Don’t worry, I’ll show you a couple of other options if you don’t have access to one.)


Measure the widest part of your bodysuit. This is a 6-9 month Circo brand (from Target). You can see it’s about 8". You’ll want to cut your strips 2-3 times longer than this measurement. I’m going to do 2.5, just to be difficult.

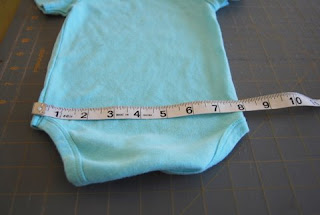
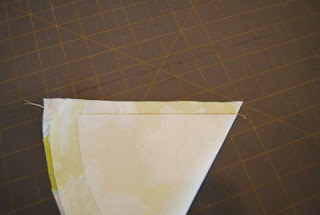
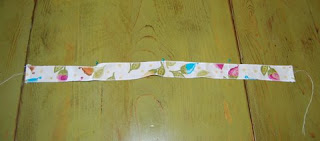
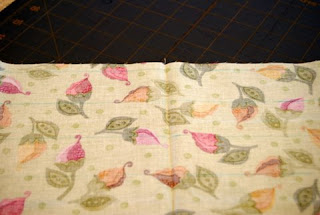
Cut three 1.5" strips of fabric. Make sure they’re 2-3 times longer than the width of the bodysuit.

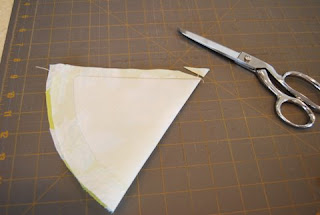
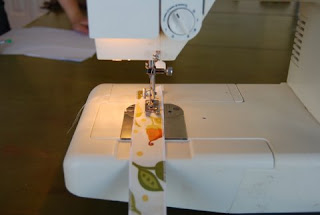
Set your serger to a 3 thread rolled hem stitch. Run the long sides of the strips through the serger, right side up, letting the knife just shave of the edge of the fabric.

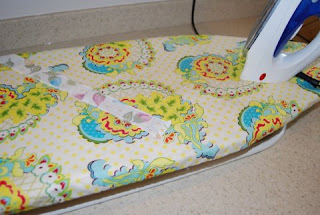
See? Not so bad! I press my strips because ironing *might* be my favorite part of sewing, but you don’t need to.

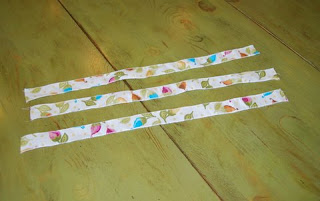
About 1" down from the top of the leg holes, measure the width of the bodysuit again.

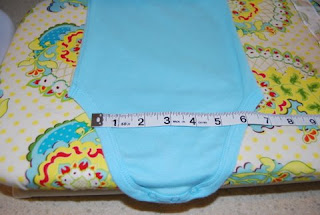
You’ll need 2 strips that are 2-3 times the length of your wider measurement and one strip that is 2-3 times the length of your shorter measurement plus. For my example, I cut 2 of my strips to 20" (2.5 X 8) and one strip to 15" (2.5 X 6).

Fold both ends of each strip under about 1/4" and press.


Stitch down the ends you just pressed under.

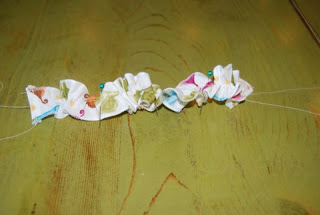
Sew a long gathering stitch down the very center of each strip.


Set the strips to the side for a second. Find the center of the bodysuit. I use a very fancy method called "folding it in half". Mark the center. I use pins. Put one up higher than your ruffles will be and one down lower.


Fold each strip in half and mark the center. Fold each half in half and mark that center, too. Again, I use pins.


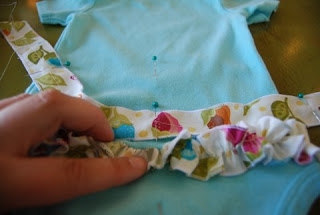
You’re going to attach the center row of ruffles first. Line it up with the tops of the leg holes. Put a pin in the center and then 1/2 the way out on each side. Since my bodysuit was 8", I put pins at the 4" mark and then at 2" and 6" marks.

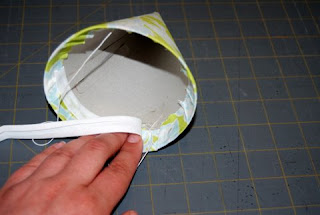
Pull your bobbin thread and gather your strip up a bit.


Now match up the pins on your ruffle to the pins on the bodysuit (excluding the really high one and the really low one). Pin the ends about 1/4" from the side seams. Adjust the gathers evenly. I like to put even more pins in at this point to keep things from sliding around. Seriously. I think I use 9 pins per ruffle. See?


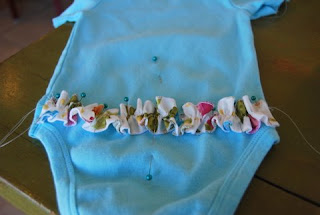
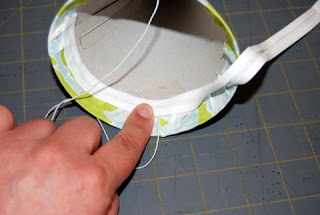
Sew down the center of the ruffle, right on top of your gathering thread. You really should remove the pins before you stitch over them, but I usually don’t.

Your first ruffle is attached now. Remember this is the center ruffle. Remove your gathering threads (you should be able to pull them out). You’ll notice that I hadn’t done this yet in the picture below.

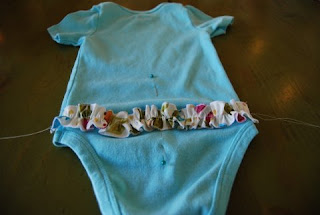
To place your upper ruffle, follow the same steps, but line it up by placing the lower edge under your center ruffle, about 1/4" from your stitching line.

2 down, one to go.

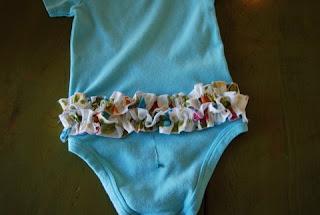
Attach the bottom ruffle the same way. Line it up by tucking the top edge under your center ruffle, about 1/4 from where you stitched the center ruffle down.


Trim all your threads and….

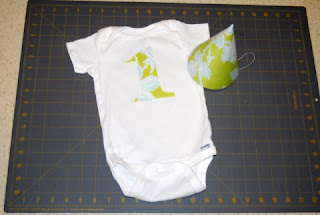
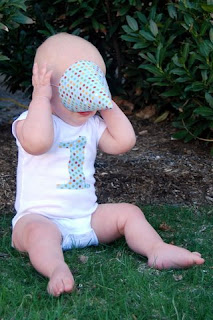
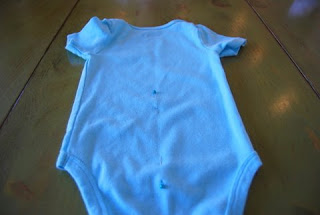
How cute is that??? What could be cuter?

I KNOW!!! (No, I did not put one of my boys in girl clothes….even if I have before….more than once…I borrowed a baby this time.)

So what if you don’t have a serger?

Option #1:

Cut your strips with pinking shears. I marked them out with a disappearing ink pen. Be sure to start down 1/2" or so from the top so you can pink both edges of all your strips.


Attach the strips in the same way as the ones with the serged edges.

Here’s what it looked like before washing:

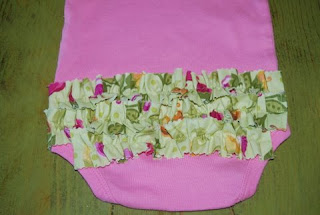
Here’s what it looked like after washing and drying:


I wasn’t really a fan of it…until it was on the baby. I have to admit, it might have been my favorite once it was on her.


Option #2:

Cut your strips 2.5" wide. Fold over approximately 1/4" on the bottom edge and hem. Then fold over 1/4" on both ends and hem.

Mark your bodysuit like this:


The lines are 1" apart with the center one being even with the tops of the leg holes.
Starting with the top line, put your ruffle right side down with the bottom of the ruffle towards the top of the bodysuit. Place the edge of the ruffle right along the top line.


Gather, pin, and sew about 1/4" from the edge of the ruffle.


Do the middle ruffle next and the bottom ruffle last. You should end up with something like this:


This is when I sprayed my disappearing ink to get it to go away.

Press your bottom ruffle down (the direction you want it to end up).


Top stitch the ruffle in place.


Do the same to the middle ruffle and then finally the top one.

Seriously cute, right?

Please follow and like us:

Today you can find me…

guest blogging at Ucreate. There’s an all new tutorial for the ruffle butt onesie I mentioned a while back. Come over and see me!

Here’s my intro post.

Here’s the tutorial.

Please follow and like us:

Indiana Jones whip(s)

I used this tutorial. I accidentally cut the strips 1.5″ instead of 1″ (because apparently I have a hard time paying attention these days) but everything still worked out OK. And guess what? My boys took turns beating the crap out of each other with this thing for most of the night. Guess what else? They really didn’t hurt each other! Woo! If you’re in the SLC area and you want to make one and you’re having a hard time finding brown flannel, Fabric Center on Redwood Road and 90th South has it in flat folds for $2.99/yard.

My sewing machine, however, didn’t enjoy this project so much. It appears that there will be a bit of a delay in finishing the 2nd whip. Like 3-5 business days. And that’s if they don’t need to order a part.

Posted by Picasa
Please follow and like us:

Fabric covered party hat

Supplies

  • Party hat – I got Curious George because they were slightly smaller than the others and they had a tab/slot thing holding then together instead of staples or glue or something. And they were cheap.
  • Fabri-Tac or hot glue. Hot glue and I have a sordid past, so I use Fabri-Tac. Fabri-Tac also doesn’t glob up and leave lumps.
  • Something to trace with. I used both a pencil and a disappearing fabric marker.
  • Fusible interfacing – 12″ x 7″, mine was medium weight.
  • Your choice of fabric – slightly bigger than 12″ x 7″, maybe 14″ x 10″
  • Scissors. I used a rotary cutter too, but it’s not necessary.
  • Ruler or straight edge
  • Ribbon, bias tape, trim, or twill tape (optional)

Open your hat, being careful not to rip the tab off. You’re going to need to put the hat back together later.

Trace the hat onto your interfacing. I used the pencil for this. Trace the entire bottom curve. On the slot side, stick your pencil in the slot and trace that, but not the outer edge. On the tab side, trace the edge, but not the tab. You’ll end up with something that looks like this:


Take your ruler and extend the slot line in both directions. Then connect the lines on the tab side and extend them out, too.


You should have something that looks like this:


Cut it out and position it on the wrong side of your fabric.


Fuse according to product directions.

Mark 1/2″ from your interfacing on both straight sides and 1″ on the curved edge. I used my disappearing fabric marker for this. See how I did a crappy job positioning and the left corner is missing? It’ll be fine.


Cut out on the lines you just drew.

If you want to add extra embellishments or appliques or something, now is the time to do that. How freaking cute would this be with a cupcake applique for a little girl’s party or even with a number on it?

Fold in half with right sides together, matching up straight sides.

Sew the straight edge with a 1/2″ seam, right along the edge of the interfacing.
Clip the point (don’t cut your stitching) at an angle.
Carefully press the seam open. Try not to crease the edges of the hat.

Turn right side out. Make sure the point of the hat is pushed all the way out.
Put your party hat back together and slip it inside your fabric hat. The seam on the fabric hat should be lined up with the tab/slot part of your party hat.
Fold the fabric edge to the inside of the party hat. Tack it down in 4 spots (evenly, I like to do the back seam, the center front and each side at the elastic). Be sure the elastic is pulled up, towards the point of the hat. Let it dry for a couple of minutes. This will keep things from shifting.
Fold and glue along the remainder of the bottom edge.


You can stop now, if you want. This next part is not necessary, but when your kid rips the hat off in a fit of rage in front of your guests, the inside will look nicer. Pick a coordinating ribbon, bias tape, twill tape, trim, etc. Here were my top 3 contenders.

I went with the bias tape because no one is really going to see it and I didn’t have a little scrap of either of the others.
Starting at the back seam, glue your trim over the top of the fabric raw edge.

When you get to the elastic, pull it back down toward the bottom of the hat before gluing the trim on top of it.

Continue around the hat (be sure to pull the elastic down on the other side, too). Tuck the edge under when you get back to the end. You’re done!


Applique a shirt or onesie to match, if you’re feeling crazy.

Template for the number one here. (Yes, I know it’s backwards…it’s supposed to be.)
Now go take some pictures of your kid showing you just what he thinks of your hat!

***For personal use only. Make ‘em, gift ‘em, please don’t sell ‘em!***

Please follow and like us:

Out cold

Posted by Picasa
Please follow and like us:

*sigh*

Campbell, of course. I suspect he’s also responsible for the melted cheese I had to clean out of the washer this morning.

Posted by Picasa
Please follow and like us:

4 kids + 1 teeter totter =

Posted by Picasa
Please follow and like us:

Ruffle butt

Last weekend, my brother and his wife flew out from Pittsburgher (as Campbell calls it) to surprise their moms for Mother’s Day. I picked them up at the airport and harbored the fugitives for a day or two before the surprising, so I figured there was no surprise for me. Wrong. Turns out they’re having a kid….at the beginning of September….and it’s a girl! You have no idea how much joy this brings to my crafting self! First up? A onesie with ruffles on the butt, of course!

Posted by Picasa
Please follow and like us:

So far, so good

The Great Potato Experiment of 2009 has already outperformed The Upside Down Tomato Experiment of 2008.
All that means is that nothing’s dead yet. Woo?

Posted by Picasa
Please follow and like us:

"911 what’s your emergency?"

See that kid? Evil. Pure evil.

A couple of weeks ago, I gave him my cell phone to keep him quiet in a church meeting. It was on silent and locked. All of a sudden, I heard beeping. Loud beeping. The kind of beeping that would indicated someone has called 911 on your phone (don’t ask how I knew but your hint is “Keller”). I jumped up, ran for the hall, and spent the next 5 minutes trying to convince the 911 operator that there was not an actual emergency, I’m just a crappy parent. Yes, I know someone called 911 from this same number less than 2 weeks ago. Stop rubbing it in. I have a lot of kids.

So, we were at a tee ball game Tuesday night. My sister in law gave Bennett her phone to play with. “Watch out. He calls 911.” So she turned the power off. Safe, right? Wrong. About 5 minutes later we hear…

“911 what’s your emergency?”

Posted by Picasa
Please follow and like us:

Creative Commons License
Crap I've Made by Char is licensed under a Creative Commons Attribution-Noncommercial-Share Alike 3.0 United States License.
Based on a work at www.crapivemade.blogspot.com.
Permissions beyond the scope of this license may be available at www.crapivemade.blogspot.com.

MyFreeCopyright.com Registered & Protected
BLOG DESIGN BY: