Giveaway #5: Original Watercolor Painting – CLOSED

Hello everyone! I am Natalie, a painter/wedding invitation designer and I am so excited to offer all of you a chance to win one of my original framed watercolor paintings. I received a painting degree from Brigham Young University and I love painting about my family and my cute 1-year-old baby boy. I am especially fond of this painting that I am giving away, titled “Waking Baby up from a Nap.”
This painting was inspired by the daily routine of taking care of my family, and the little things that I do everyday that are special to me and make all the difference. The unique geometric design was inspired by the floor plan of my baby’s nursery room.
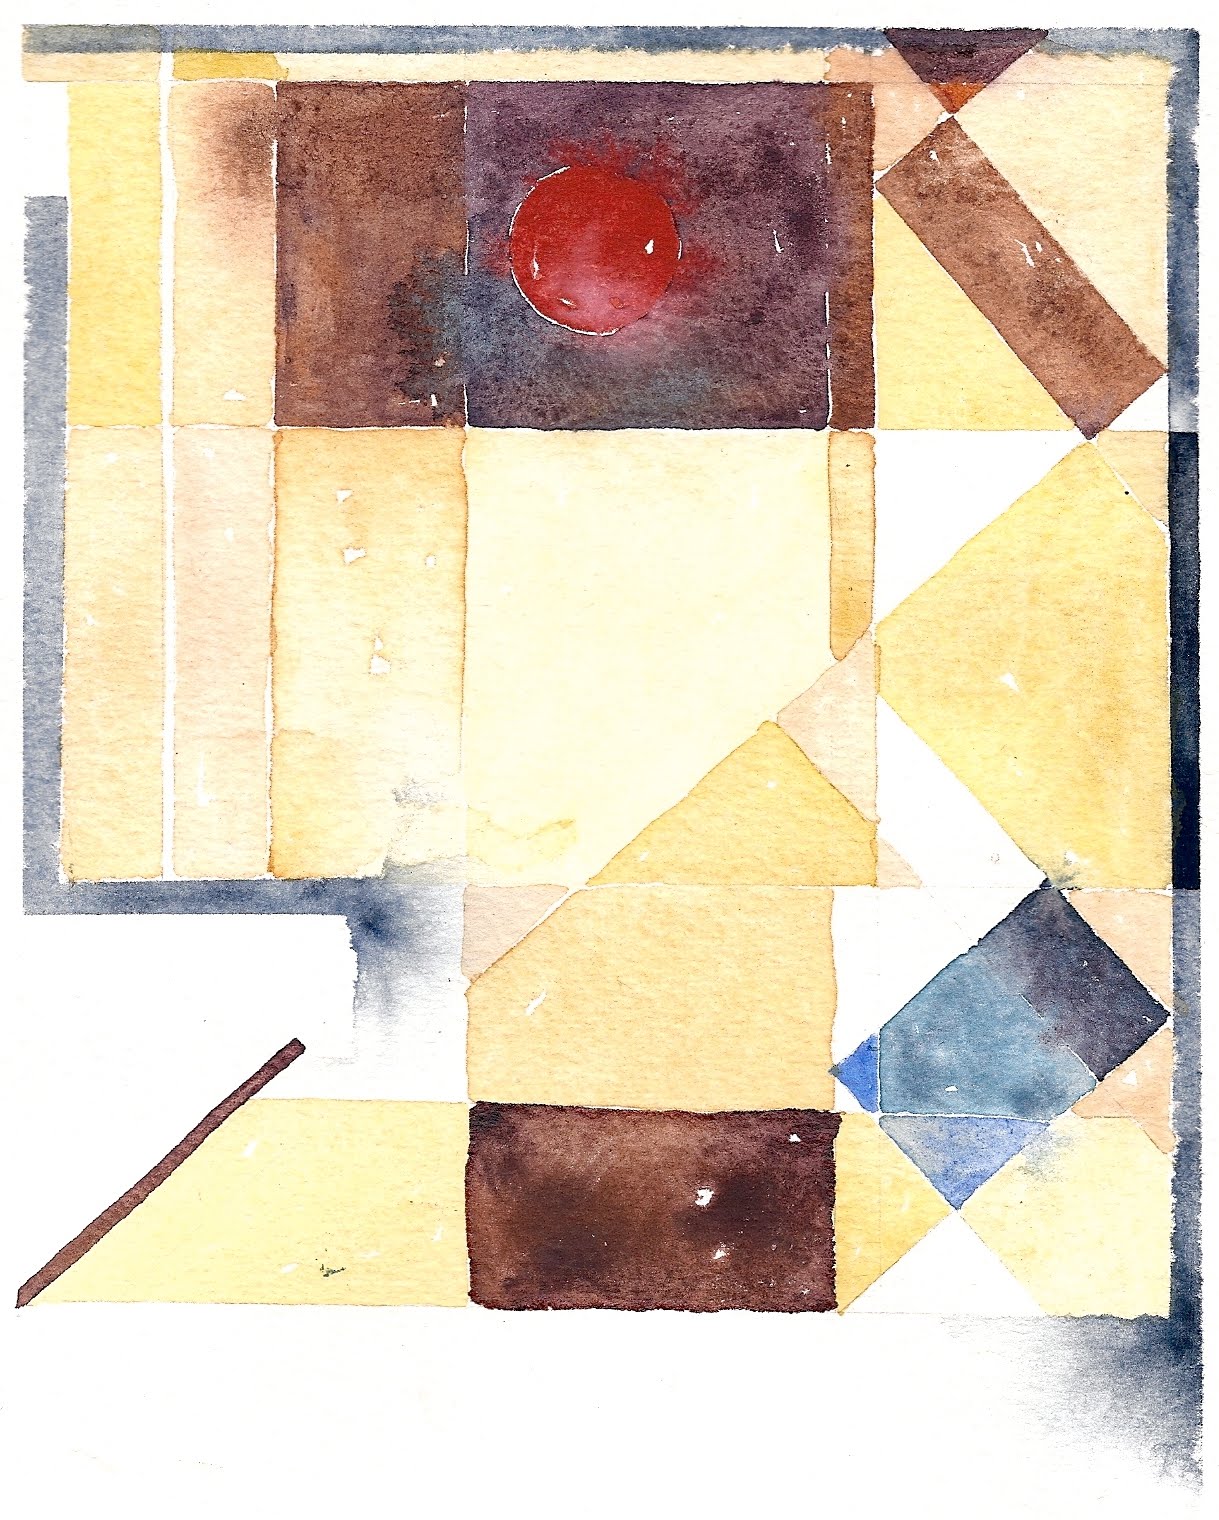
This painting is watercolor on Arches watercolor paper. This piece has been framed in a completely 100% archival quality. The frame is white painted birch wood, and the mat is 100% cotton museum board. This painting was hung in my solo exhibition this last April-May that was themed “Hearth and Home” — all paintings inspired by my home and family.
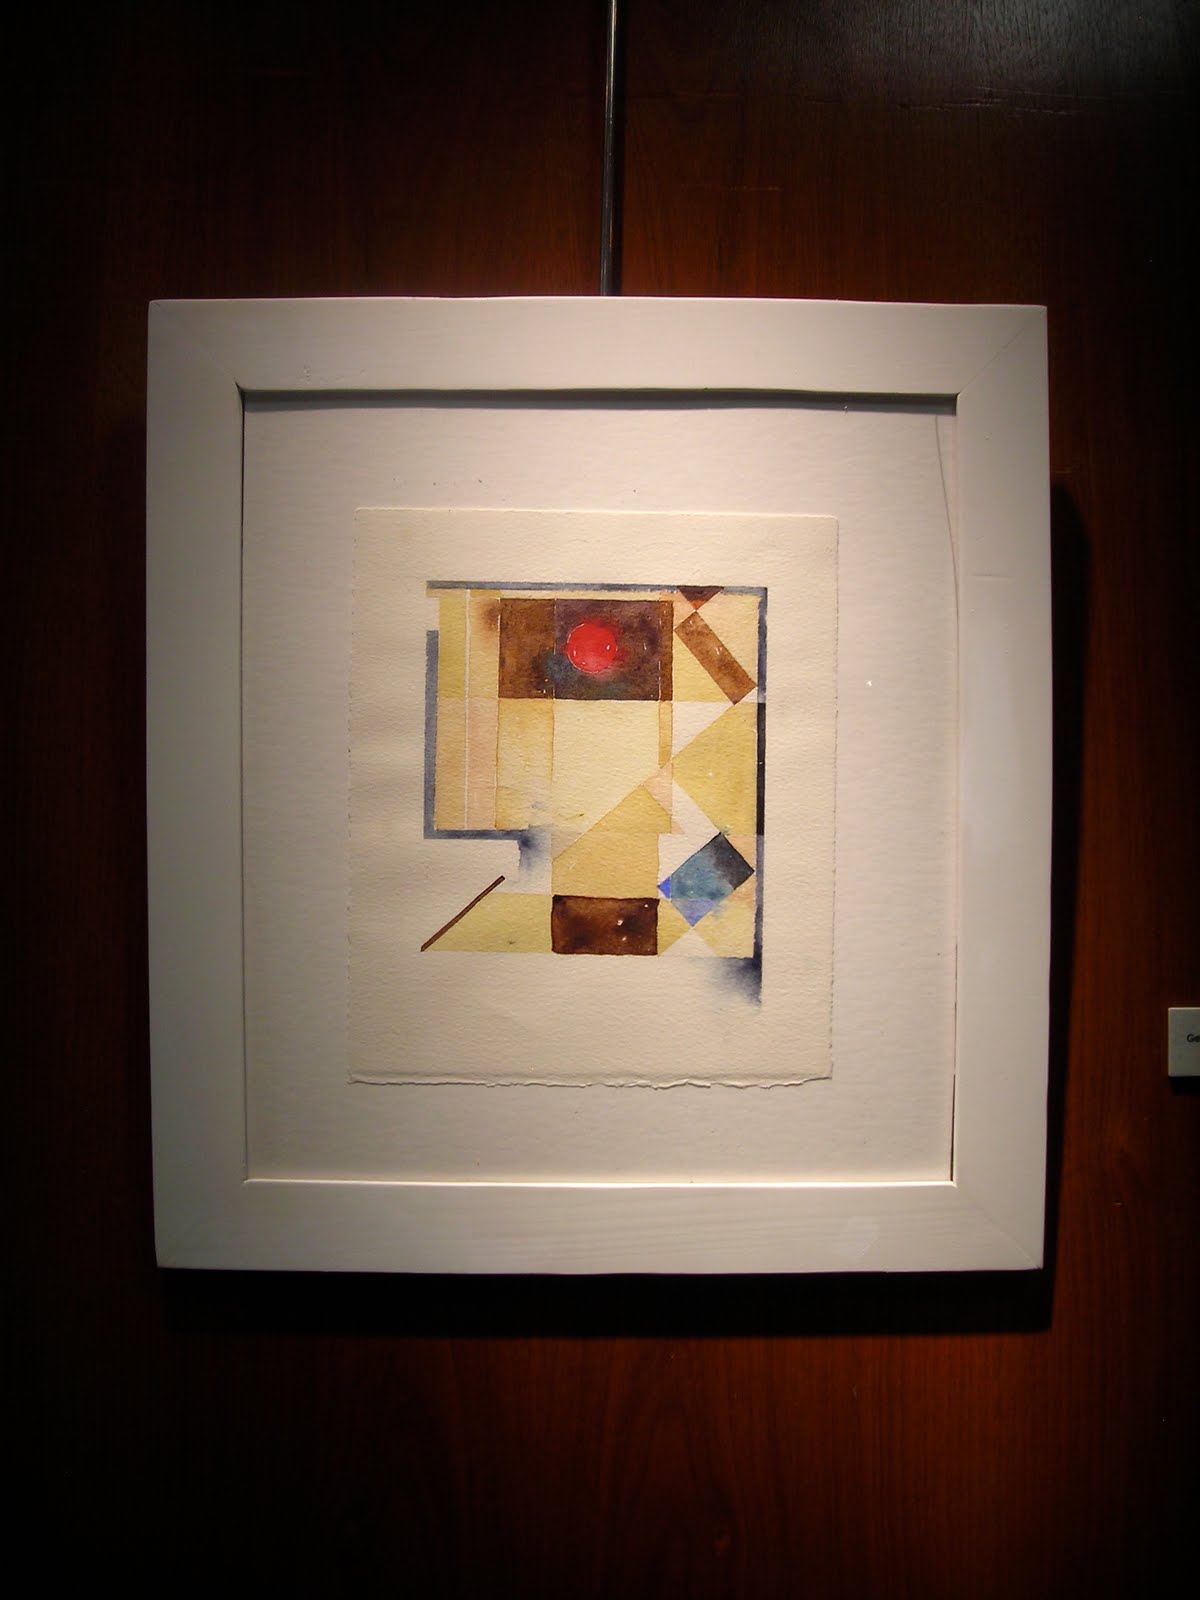
There is a scratch on the glass in the upper right hand corner, and even with that discounted, this painting is worth $125. The finished size is 16″x17″.
I am so excited to give this special painting away. You can all buy my paintings on my etsy shop, and follow my painting journey and win more of my art on my art blog. I’d love for you to stop by and say hi!
TO ENTER:
Click on over to Natalie’s Etsy shop. Come back and leave a comment ON THIS POST with which of her paintings is your favorite!
Please follow and like us:

Giveaway #4: Lady Cupcake’s Corner – CLOSED

Cory from Lady Cupcake’s Corner is offering up one lucky reader a chance to win $20.00 in merchandise from her shop!!
And $20.00 goes a long way at Lady Cupcake’s Corner!
Here’s a little taste of some cute items you could get….
Or maybe a couple cute little Cupcake Keychains, $4.00
This Fabric Rosette Headband would spice up any outfit!! $8.50
Lady Cupcake’s Corner has a lot of styles to choose from and many other super fun items.
Wanna chance to win???
Well… I’ll make it easy for you….
Just head on over to Lady Cupcake’s Corner, take a look around and then come back here and leave a comment on this post telling me what your favorite item is.
That’s it!
Good Luck!
(Open to readers in the US and Canada only!)
Please follow and like us:

Giveaway #3: Willow Baby – CLOSED

Today one reader will win a $10 gift certificate to the Esty shop, Willow Baby!
Willow Baby specializes in unique and modern handmade baby goods. The owner, Shirley, who also blogs at These Moments of Mine offers adorable bibs, embellished onesies, baby toys and more!
for   crap ive made giveaway
To enter the giveaway, visit Willow Baby and come back here to leave a comment on how you might spend the $10 gift certificate if you win.
For a second entry “like” Willow Baby on Facebook and then come back here to leave a comment that you did.
And finally for a third entry, share this giveaway on Facebook or Twitter and leave a comment stating that you did so.
Please follow and like us:

Giveaway #2: TWO $10 gift certificates from A Vision To Remember – CLOSED

Bobbie from A Vision To Remember offers custom baby rag quilts, car seat covers, tutorials, patterns, PIF Free patterns and DIY kits.
There is nothing more special than a handmade gift. Bobbie’s patterns for infant car seat tents and rag quilts are easy and to make and can be whipped up in just a few hours. She has a total of 13 different patterns to choose from in her store! There is also a large selection of ready-to-ship items as well if you don’t want to make them yourself!

Order a premade rag quilt or order the pattern to make one yourself!

And don’t forget to create a little belly love for that changing body of yours! This Pattern is perfect for mommies in waiting!

And check out this fun hair clip! Patterns await!
Bobbie’s most popular items include:
A Vision to Remember wants to make 2 lucky readers very happy by giving them each a gift credit of $10.00 to use in their shop! Awesome, right?
And they also want to give everyone the chance to get a pattern 1/2 off! Buy one pattern get the second Half off! Just be sure to make a note to seller to ask for the discount!
Here’s how to enter to win…. please leave one comment per entry!
  1. Jump on over to A vision to Remember and take a look around! Report back here telling me what you love!
  2. Visit there blog HERE and say hello!
  3. Help spread the word about this fun new company by blogging, tweeting or facebooking about this giveaway with a link back to this post!
Please follow and like us:

Giveaway #1: Tidy Trays – CLOSED

Hello Amazing Crap Makers!


I found and fell in love with The Crap I’ve Made very recently when my sister in law sent me the link. I have linked from blog to blog taking on different craft ideas that seem fun to me. I have recently started blogging at http://craftalicous.blogspot.com/ my attempts at the crafts I have found and other ideas I come up with on my own or around the internet. I work for our family owned business New Phase Inc. the makers of Tidy Craft, craft, sewing and fly fishing organization products. We have an ebay store where you can see our products http://myworld.ebay.com/advantage.crafts


I am happy to offer a set of Tidy Trays to celebrate the success of The Crap I’ve Made.


Here is what you will get:

5951fad02ab17e56b93ef92321d6a7c0.image.181x200


Our Combo Trays-No more glitter or powders ending up all over the table or floor. This no spill funnel tray is designed to control craft media…glitter, powders, beads, colored sand, and more.

Controls the media during use, then just hold the funnel end of the tray back over its original container (or one of our shuttle cups) and watch the material glide easily back into it – safety and neatly-no waste-no mess.

Durable, high impact styrene 10”x16”x1” purple tray and 6″ x 10.1″ pink tray. Both trays come with a convenient plug for the funnel.

Brush and glitter not included (Hint for ease of use: wipe down with a dryer sheet before using for glitter and powders, it helps to reduce the static and allows them to funnel out easier)

Please follow and like us:

1,000,000

So, I made it.

mill

OK, you guys made it.

And, in honor of all of you, I’ve got a whole week of giveaways lined up….really good crap, too!

The giveaways start first thing Monday morning, at 6 am MST.

I’ve got something every 4 hours (except 2 am, but I might still sneak a few in there) for the rest of the week.

YOU DESERVE IT!

And now the fine print:

All giveaways will run for a minimum of 5 days.

I’ll keep a running list of the giveaways over in the left sidebar.

Assume that the giveaway is for residents of the US and Canada only, unless it says otherwise.

And, I received no monetary or product compensation for any of these.

Ready!  Set!  WIN!!!

Please follow and like us:

Zippered Laptop Sleeve Tutorial

In case you missed it during the Holiday Bake, Craft, & Sew Along, here’s my tutorial for a zippered laptop sleeve. Since it’s measurement based, you could adapt it to fit an iPad or other electronic gadget, too.

DSC_0188

Supplies:
Outer fabric
Lining fabric
Fusible fleece
Zipper (approximately 4” longer than your laptop)
Embellishments

Measure your laptop, wrapping your tape measure all the way around.

DSC_0148 DSC_0149

Mine measures 18.5” X 24.5”. (Yes, it’s tiny.)

Split both of those measurements in half. In my example, that would be 9.25” X 12.25”. Add 1.25” to both of those measurements. In my example that’s 10.5” X 13.5”. We’re finished with the math. Cut 2 pieces from your outer fabric this size. Cut 2 pieces from your lining fabric this size. Cut 2 pieces of fusible fleece this size. I then trimmed 1/2” off all around my fusible fleece because I didn’t want the bulk in my seams.

DSC_0151

Embellish one of your exterior pieces as desired now. I’m including directions for exactly how I made mine, but feel free to change that up to personalize your laptop sleeve.

Cut a strip of fabric 3.5” wide and then press under 1/4” on the top and bottom edges.

DSC_0154

Position on the front of your laptop sleeve and stitch in place along both edges.

DSC_0155DSC_0156

Cut a strip of fabric 3” high by at least twice the width of your laptop case. Fold under 1/2” on both long edges and press.

DSC_0158

Run a long gathering stitch (do not backstitch) about 1/4” in along both long edges. Pull your bobbin threads to gather evenly. Position in the middle of the larger strip and stitch in place.

DSC_0161

(I made the decorative flower using these directions on WiseCraft. It’s attached to a pin and is removable so you won’t see it until the final pictures.)

Iron your fusible fleece to the wrong sides of both pieces of outer fabric, following the manufacturer’s instructions.

DSC_0152

Take your zipper and place it face down and centered along the top edge of your front piece. You should have excess zipper on both ends.

DSC_0163-1

Pin the zipper in place in the center. In order to get the zipper to go around the corners nicely, you’re going to make a few shallow snips along the part you need to bend.

DSC_0165-1

Keep on pinning around both corners. I like to use A LOT of pins.

DSC_0166-1

Baste the zipper in place. I used white thread so it would show up better for photographic purposes.

DSC_0167-1

Position your lining fabric directly on top of your front piece, right sides facing.

DSC_0168-1

Sew just inside of your basting line. Turn your pieces right side out. Press your exterior and lining fabrics away from the zipper.

DSC_0170-1

Close the zipper. Position your other exterior piece on top, so the sides are even. Slide it up until it’s even with the zipper and pin. Unzip and repeat the zipper installation steps for the back half of the case.

Here’s what you’ve got now…nice neat zipper and ugly unfinished seams everywhere else.

DSC_0174

Pull your exterior fabrics over so the right sides are facing, like this:

DSC_0176

Keep turning until you’ve got both exterior pieces facing and both lining pieces facing.

DSC_0177

Don’t be alarmed by the hot mess it appears to be right now. You’re *almost* there!

Reach up between the exterior layers and undo the zipper a few inches (big enough to fit your hand through and reach to undo the zipper the rest of the way later).

You’re going to sew ONLY on the exterior pieces. Fold, pull, and otherwise maneuver the lining pieces out of the way. You’ll be sewing from one end of the zipper to the other.

DSC_0180

In the above picture, you’d sew from one pin, down around the bottom edge and then up to the other pin.

Repeat with the lining pieces, BUT leave a 4-5” hole in the bottom (again, big enough to fit your hand through).

DSC_0181

Stick your hand way up in there and grab the bottom seam on the exterior fabrics.

DSC_0182-1

And pull it out through the hole.

DSC_0183-1

DSC_0184-1

Close up the hole in the lining. I usually pull it all the way out and machine stitch close to the edge, but you could hand stitch if you prefer.

Aaaaaaaaaaaand you’re done!

DSC_0186

Please follow and like us:

Flickr Feature Friday

Did you know Crap I’ve Made has a Flickr group? You can find the link at any time up on my menu bar under Crap You’ve Made. Go add your stuff! Please?

Projects from the Flickr group will be featured on Fridays.

And, there’s now a Flickr stream widget over in my left sidebar. Click on over from your reader and check that out.

Today’s feature is from The Paisley Cupcake.

4815852507_6598256b2a_b

I love that iris one on the right!

Always wanted to applique?  Check out my applique tutorial (and a couple of free patterns)!

************

DON’T FORGET : Monday marks the beginning of a week full of AWESOME giveaways in honor of my 1,000,000th hit!

Please follow and like us:

Today you can find me

at Skip To My Lou for this:

BigSew

with a brand new tutorial for this:

DSC_0188

Check it out, will ya?

Please follow and like us:

3170 to go

Popping in really quick from sunny (but cool) SoCal to tell you all I’ll be home soon and that the week of giveaways to celebrate 1,000,000 hits starts Monday.
Note to self: Even if you bring your laptop, 6 people in one hotel room doesn’t provide you with much/any blogging time.
And, to point out just how dang close to 1,000,000 hits we are. In fact, if you click on over from your reader today, we’ll hit 1,000,000 by bed time.
XOXOXO
Please follow and like us:

Creative Commons License
Crap I've Made by Char is licensed under a Creative Commons Attribution-Noncommercial-Share Alike 3.0 United States License.
Based on a work at www.crapivemade.blogspot.com.
Permissions beyond the scope of this license may be available at www.crapivemade.blogspot.com.

MyFreeCopyright.com Registered & Protected
BLOG DESIGN BY: