




When the nice folks at Lowe’s told us that our challenge for the month was a “bird retreat”, I was not excited. See, I DETEST birds. They’re basically just rats with feathers, right? 
My first idea was to take a picture of my dryer vent, because heaven knows there’s a bird in there every. single. morning. And you can totally buy dryer vents at Lowe’s, right? While this idea was a terrible one, it got the wheels turning and got me started thinking about other things that could become a bird retreat…like this mailbox:

(The how to on the polka dots will be in a separate post, probably tomorrow.)
I went to Lowe’s and picked up some supplies:

I got a mailbox (it’s the oversized kind), birdseed, chain, some little locking link things (close up picture later in the post), eye bolts, washers, nuts (which led to an exchange that embarrassed Macy so badly she hid on another aisle, but that’s a story for another time), drawer pulls, and machine screws.
The other 2 items in the picture are a vintage bottle hummingbird feeder and pre-mixed nectar. Once the snow stops, I’ll hang it near the mailbox birdhouse for the ultimate bird retreat. The vintage bottle feeders are about $15 at Lowe’s and frickin’ cute. They also come in clear.
The first thing you’re going to want to do is mark where your eye bolts will be mounted (one at the front, one at the back). A dry erase marker works fabulously for this. I marked the center of the mailbox ends and then moved in about an inch from that mark when I made my holes.

Next, take a hammer and nail and tap the nail on your mark just enough to make a dent. The dent keeps your drill bit from bouncing around once you start drilling.


Using a drill bit just bigger than your eye bolt, drill a hole in the mailbox.

Once your holes are drilled, put an eye bold through each one and fasten it securely on the inside with a washer and a nut. You might need a wrench to get it really tight.

(Obviously not tightened, but I wanted to show you what I meant.)
Next, I decided where I wanted my drawer pulls turned bird perches mounted. I marked the door of the mailbox

and then followed the same hammer and nail/drilling procedure that I used for the eye bolts.
Put the drawer pulls on using 1/2” machine screws. The ones that come with the pulls are meant to accommodate a cabinet door, not a mailbox (strange, right?), so they’re too long.

Using these locking links (not the real name…you find them by the chain)

attach chains to your eye bolts.
I cut a piece of 2 X 4 the width of the mailbox and pounded it into the gap between the box and the door. It keeps the seed from falling out and keeps the door open. It fit in so tightly that I didn’t need to screw it in place, but you could for sure do that if yours doesn’t fit as tightly. Somehow I missed photographing this step, but you can see it in the finished product pictures.
Keep in mind that I woke up to this:

So, it’s not hanging in an actual tree. And I’m a wuss whose neighbors were staring, so some of the pictures were taken indoors.
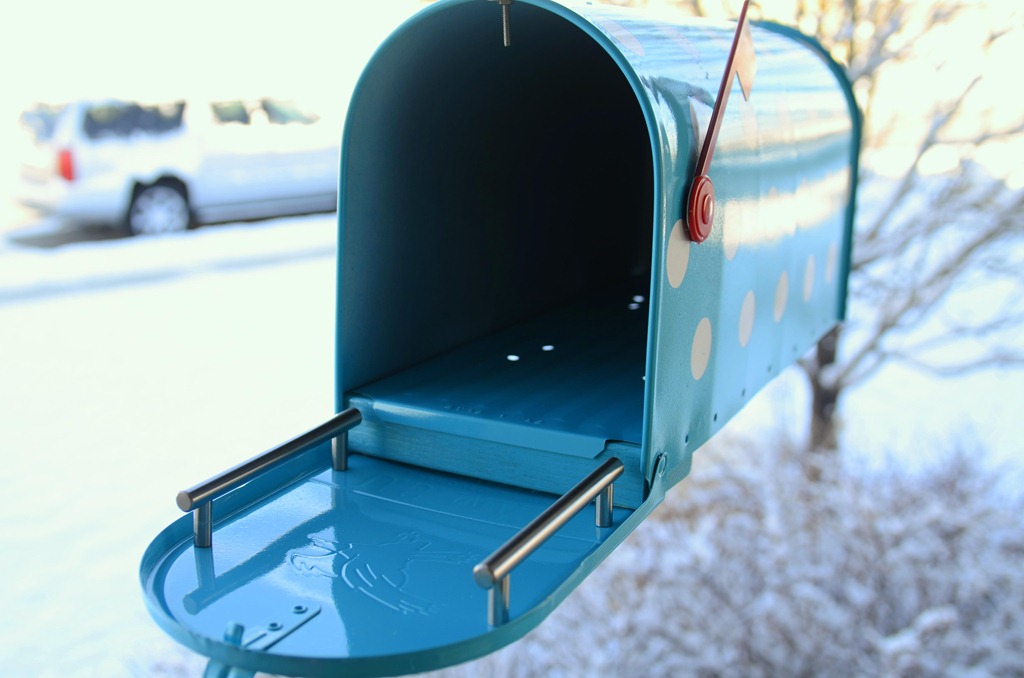
(There’s a good shot of the piece of 2 X 4)
The birdseed goes here:

It holds quite a bit more than you’d think.


Don’t have a tree or a covered porch to hang it from? You can buy pre-assembled mailbox posts (Lowe’s carries them for about $25) and could stick it in a flower bed or a garden.
Fun, right?
I’m glad Lowe’s got me to stretch a bit this month. It felt good to get creative.
Don’t forget to pick up a FREE Subscription to Lowe’s Creative Ideas Magazine:

You can also find Lowe’s Creative Ideas on Facebook. (They’ve moved, so if you “liked” them before, you should “like” them again!)
And, now there’s a Lowe’s Creative Ideas blog. Go have a look around. You might recognize a face or two.
Disclosure: Lowe’s provided me with a gift card for supplies for my bird retreat.