


(Originally posted on UCreate)
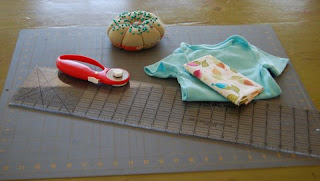
Supplies:
- Baby bodysuit
- Fabric
- Pins
- Rotary cutter and mat or scissors
- Sewing machine
- Serger (Don’t worry, I’ll show you a couple of other options if you don’t have access to one.)
Measure the widest part of your bodysuit. This is a 6-9 month Circo brand (from Target). You can see it’s about 8". You’ll want to cut your strips 2-3 times longer than this measurement. I’m going to do 2.5, just to be difficult. 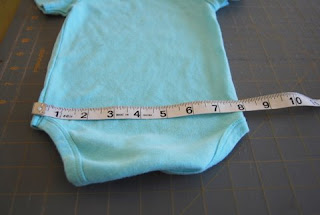
Cut three 1.5" strips of fabric. Make sure they’re 2-3 times longer than the width of the bodysuit. 
Set your serger to a 3 thread rolled hem stitch. Run the long sides of the strips through the serger, right side up, letting the knife just shave of the edge of the fabric. 
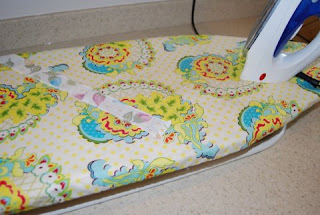
See? Not so bad! I press my strips because ironing *might* be my favorite part of sewing, but you don’t need to. 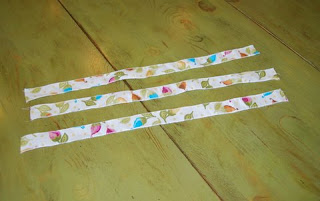
About 1" down from the top of the leg holes, measure the width of the bodysuit again. 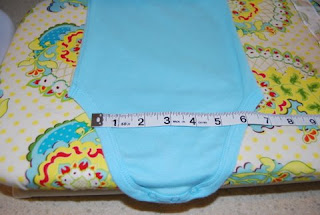
You’ll need 2 strips that are 2-3 times the length of your wider measurement and one strip that is 2-3 times the length of your shorter measurement plus. For my example, I cut 2 of my strips to 20" (2.5 X 8) and one strip to 15" (2.5 X 6).
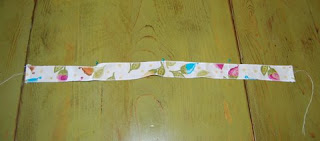
Fold both ends of each strip under about 1/4" and press.
Stitch down the ends you just pressed under.

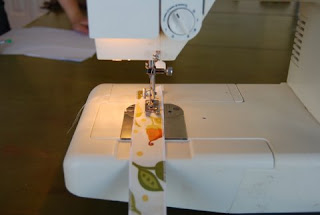
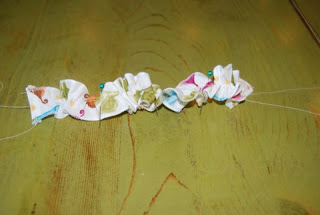
Sew a long gathering stitch down the very center of each strip.
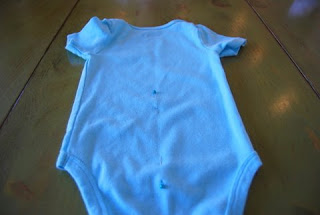
Set the strips to the side for a second. Find the center of the bodysuit. I use a very fancy method called "folding it in half". Mark the center. I use pins. Put one up higher than your ruffles will be and one down lower.
Fold each strip in half and mark the center. Fold each half in half and mark that center, too. Again, I use pins.
You’re going to attach the center row of ruffles first. Line it up with the tops of the leg holes. Put a pin in the center and then 1/2 the way out on each side. Since my bodysuit was 8", I put pins at the 4" mark and then at 2" and 6" marks. 
Pull your bobbin thread and gather your strip up a bit.
Now match up the pins on your ruffle to the pins on the bodysuit (excluding the really high one and the really low one). Pin the ends about 1/4" from the side seams. Adjust the gathers evenly. I like to put even more pins in at this point to keep things from sliding around. Seriously. I think I use 9 pins per ruffle. See?
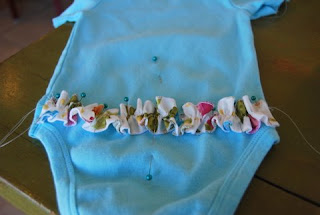
Sew down the center of the ruffle, right on top of your gathering thread. You really should remove the pins before you stitch over them, but I usually don’t. 
Your first ruffle is attached now. Remember this is the center ruffle. Remove your gathering threads (you should be able to pull them out). You’ll notice that I hadn’t done this yet in the picture below.
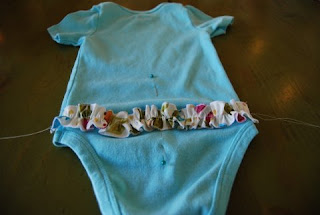
To place your upper ruffle, follow the same steps, but line it up by placing the lower edge under your center ruffle, about 1/4" from your stitching line.
2 down, one to go.
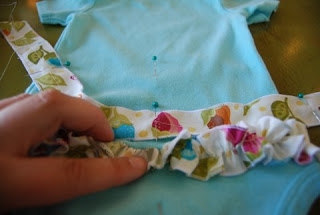
Attach the bottom ruffle the same way. Line it up by tucking the top edge under your center ruffle, about 1/4 from where you stitched the center ruffle down.

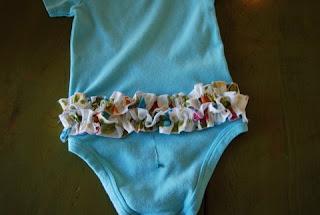
Trim all your threads and…. 
How cute is that??? What could be cuter?

I KNOW!!! (No, I did not put one of my boys in girl clothes….even if I have before….more than once…I borrowed a baby this time.)
So what if you don’t have a serger?
Option #1:
Cut your strips with pinking shears. I marked them out with a disappearing ink pen. Be sure to start down 1/2" or so from the top so you can pink both edges of all your strips.
Attach the strips in the same way as the ones with the serged edges.
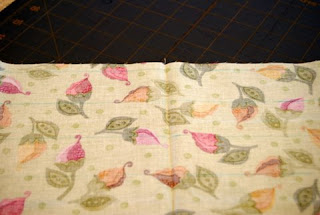
Here’s what it looked like before washing:
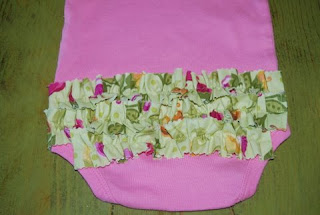
Here’s what it looked like after washing and drying:

I wasn’t really a fan of it…until it was on the baby. I have to admit, it might have been my favorite once it was on her.

Option #2:
Cut your strips 2.5" wide. Fold over approximately 1/4" on the bottom edge and hem. Then fold over 1/4" on both ends and hem.
Mark your bodysuit like this:

The lines are 1" apart with the center one being even with the tops of the leg holes.
Starting with the top line, put your ruffle right side down with the bottom of the ruffle towards the top of the bodysuit. Place the edge of the ruffle right along the top line.

Gather, pin, and sew about 1/4" from the edge of the ruffle.

Do the middle ruffle next and the bottom ruffle last. You should end up with something like this:

This is when I sprayed my disappearing ink to get it to go away.
Press your bottom ruffle down (the direction you want it to end up).

Top stitch the ruffle in place.

Do the same to the middle ruffle and then finally the top one.

Seriously cute, right?


I am making this right now…it is just getting cuter and cuter! It is going to be an adorable baby shower gift. Did I mention it has a cupcake appliqued on the front?
I am totally thankful for the tutorial!! It is baby season in my life!! They are just so darn cute!! Thanks for sharing!!
This is so cute. I had so much fun making them. Great tutorial! You can see mine at Hammer & Thread
This is so cute. I had so much fun making them. Great tutorial! You can see mine at Hammer & Thread
Just made option 2 and love it…I'm going to try the other options tomorrow. Thanks
This is such a cute project. I've actually linked to this tutorial from the Homemade Baby Gifts page on my baby gifts site and would love permission to use a pic as well. Keep on crafting!!
OMG I LOVE YOU!!! lol. This is awesome!
I just made one, I used a wider ruffle and it looks like she's wearing half a tutu. I love it!
So dang cute Char! Love a good ruffled butt! ;o)
thumbs up!
happy crafting!
Linda
So, so cute! I’m a fan!!
So cute! Going to have to try this right away. I will admit, I may have spit out my drink when you said your favorite part of sewing is ironing. Although, I’m slightly obsessive about no wrinkes, I wouldn’t call ironing my favorite part. I having missing fingertips to confirm that! Thanks for the tute!
What a nice shower gift.
from a non-sewer, this is adorable! I am gonna have to try it.
Ok…so I’ve never sewn and I’m staring at my new Singer Confidence Quilter machine….I GOT THIS! thanks for the directions, my 5 month old Viv will be style’n in no time!
The Onesies are adorable. I love them. I’m so going to try this.
THANK YOU! for this tutorial.. I have been admiring it for a long time and finally got around to giving it a go.
http://berrystitch.blogspot.com.au/2012/01/ruffle-bottom-onesie.html
I also just wanted to say – I LOVE YOUR BLOG! You are very inspirational! Congratulations on making BHG! I can’t imagine how excited you are.
Nat
What a great idea…..my granddaughter wears a lot of these, it’s certainly going to be fun to dress some of these up for her.
I made Option #2 since I don’t have a serger. It came out soooo cute! Awesome tutorial, thank you
What thread did you use to sew on Lycra?
I didn’t sew on Lycra, just cotton blend and I used regular old thread.
This was such a great tutorial; very clear and the alternate methods were excellent for those of us who are Serger-less. I linked to your tutorial on my blog (hope you don’t mind?) as my inspiration! Keep up the excellent work!
Thank you for this great tutorial! I used knit fabric for the ruffles because it doesn’t fray and I didn’t need to serge or sew the edges. See mine here http://www.1plus1equals9.com/?p=238. Thanks again.
Hmm is anyone else encountering problems with the pictures on this blog loading?
I’m trying to determine if its a problem on my end or if it’s the blog.
Any responses would be greatly appreciated.
Could someone tell me how to put this on Pinterest? I love this so much, I have 3 niece that would look cute in these.
I was wondering is there a way for this project to be done by hand? I don’t have a machine but I really love this for my new niece due in 4 months. Thank you for sharing this wonderful project.
Did you use a straight stitch or a zig zag when attaching the ruffle? I’ve had problems with knit fabric not stretching after sewing fabric on.
Having read this I believed it was rather enlightening.
I appreciate you finding the time and energy to put this
content together. I once again find myself spending way
too much time both reading and leaving comments. But so what, it was still worth it!
Hello are using WordPress for your blog platform?
I’m new to the blog world but I’m trying to get started and create my own. Do you need any html coding expertise to make your own blog?
Any help would be greatly appreciated!
This is all accomplished without ever having to ask
the customer that age old question: “how did you find us. In order to make the campaign profitable, it is usually necessary to mail out to many thousands of people, each one a potential customer. Note that the white edge is part of the QR code, it is actually black patterns on a white box, so make sure you get it all.
Today, while I was at work, my cousin stole my iphone and tested to see if it can survive a 40 foot drop, just so she can be a
youtube sensation. My iPad is now broken and she has
83 views. I know this is completely off topic but I had to share it with someone!
When someone writes an article he/she keeps the plan of a user in his/her brain that
how a user can be aware of it. So that’s why this post is outstdanding.
Thanks!
I don’t even know how I ended up here, but I thought this post was great.
I don’t know who you are but certainly you’re going to a famous blogger if you aren’t already Cheers!
That is a very good tip particularly to those fresh to the
blogosphere. Simple but very accurate information… Thank you for sharing this one.
A must read article!
Univers Running ouverture 5% en tenant remise supplémentaire à valoir sur vos
prochains achats. Quelque tantôt ceci raide
en tenant votre commande, toi cumulez 5% à l’égard de cette récompense en tenant vos achats dans unique cagnotte.
Un fois connecté à votre tactique et la commande passée,
vous pouvez voir votre cagnotte créditée en compagnie
de vos abscisse fidélité utilisable instant 6 mois et à l’exclusion de minimal d’emplette.
Cette timbre Bébé Comfort a moins 10% sur les ombrelles, poussettes,
gibecière à envelopper de la collection 2014.
POUSSET14 14/06 , 2014 2500 cinématographe après
séries dans DVD chez part en compagnie de 5 au collection sont à 30€, tantôt bizarre économie estimée avec 10 à 30€
(50%) remplaçant votre sélection 5DVD30EUR 24/08 , 2014 Incontestables crèmes ensuite produits en tenant concentration Economisez en toi abonnant
Selon savoir plus sur l’projet T-shirt selon maillon côtelée pur coton.
Hmm is anyone else having problems with the images on thyis
blog loading? I’m tryong to find out if its a problem on mmy end or if it’s the blog.
Any responses would be greatly appreciated.
Oh this is so cute and easy! Im going to make lots and get my friend to embroider sime cute things to applique!
Wonderful post! We are linking to this particularly great content on our site.
Keep up the good writing.
Great post.
Fastidious replies in return of this query with solid arguments and telling the whole
thing about that.
I know this website offers quality depending posts and other
stuff, is there any other web site which offers these information in quality?
naturally like your website however you need to test the spelling on several of your posts.
A number of them are rife with spelling problems and
I to find it very bothersome to inform the reality however I’ll definitely come again again.
Helpful info. Lucky me I discovered your site
by accident, and I’m surprised why this coincidence did not
happened earlier! I bookmarked it.
I have to thank you for the efforts you’ve put in penning this blog.
I really hope to check out the same high-grade blog posts by you
in the future as well. In truth, your creative writing abilities
has motivated me to get my own site now
Excellent article. I absolutely appreciate this site.
Keep it up!
“Say, you got a nice article.Really thank you! Really Cool.”
Wow! It looks so nice!!
This is soooo!! Cute ,I just had a third great grand daughter I must make a couple.Thanks,Bettye