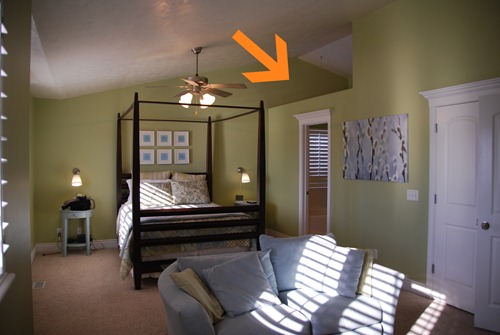
Basement Bathroom Makeover, courtesy of Lowe’s

The Lowe’s project/challenge this month was a bathroom.  I was stumped.  My house is newer, only 8 years old, so all of our bathrooms are in pretty good shape.  Our basement bathroom has been finished even less than that…maybe 5.5 years.  So, I picked a bathroom based on the process of elimination.

Kid bathroom?  Dr Seuss-y and I love it.  Don’t want to change that one yet.


Master bathroom?  Has a wall that doesn’t go all the way to the ceiling, which means that any painting would have involved also painting my entire master bedroom.  Last time I did that by myself it took 5 whole days.  And, if I picked a color that didn’t work with my existing bedding…  You see the size of project this could have turned into, right?

DSC_0189

Powder room?  Like one square yard.  You can’t get in there to photograph (we bloggers worry about these things) and I just redid the mirror in the last couple of months.  Plus, there’s not really space for anything other than the toilet and the pedestal sink.

So, the basement bathroom it was, in spite of the fact that there’s no natural light (back to that thing where we bloggers worry about our pictures Winking smile).

Truthfully, I NEVER use this bathroom.  As in, I have never ever ever bathed/showered down there (in 5.5 years) and maybe use the toilet portion once a month.  My kids have get to clean toilets when they talk back, so I can’t even think of the last time I was down there to clean it.  Once I got down there, I realized that this should have been my obvious choice from the get go.

D7K_9190

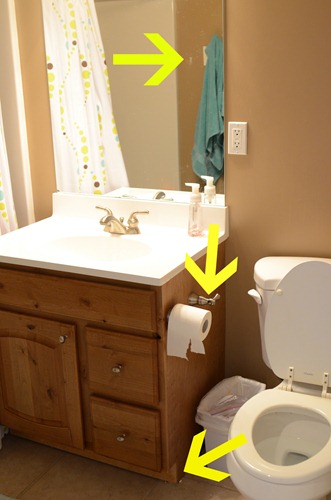
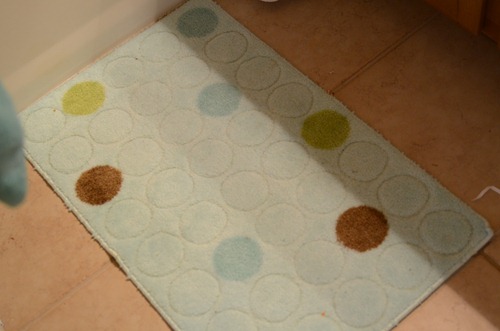
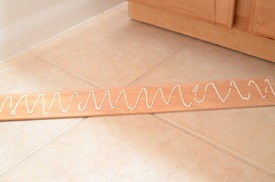
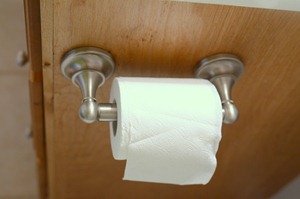
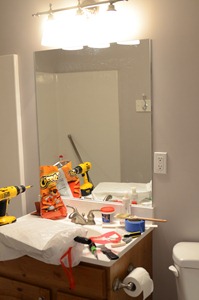
The towel bar had been ripped off by a kid doing chin ups.  The wall patches hadn’t been painted.  The toilet paper holder was broken and no longer able to actually hold toilet paper.  The kick place on the cabinet had fallen off.  And don’t even get me started on that wall color.  When I showed a friend the before picture, she called it “cat turd brown”.  Let’s also not talk about what happened when someone washed the formerly white rug with the towels:

D7K_9192

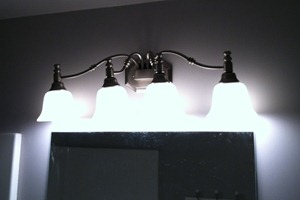
I was not a fan of the light fixture either…too pointy or something.

D7K_9193

So, I headed to Lowe’s for some inspiration.

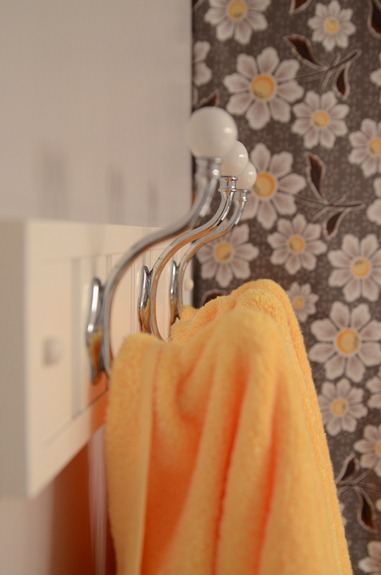
I don’t have a way before picture of the towel rack situation, but you’ll just have to imagine that it was pulled completely off the wall based on the super human girth strength of one or more of my children. Because it had been securely drywall anchored in place (after the first time it came down), A LOT of the wall came out with it.  Instead of replacing a huge chunk of drywall, I decided to come up with another option for towel hanging.  I found this coat rack in the closet/garage/organization section at Lowe’s and thought it would be perfect:

photo (30)

I picket up a new toilet paper holder and a light fixture and then headed back to get some molding to frame the mirror.  I also picked up 398472 paint samples.
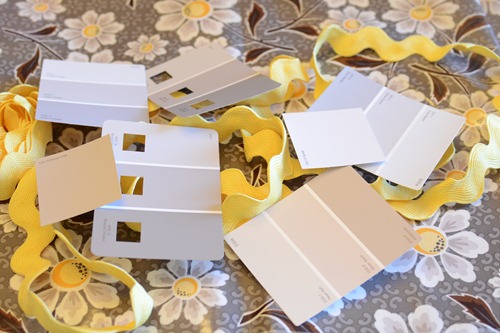
D7K_9185
(That fabric is a laminated cotton from Riley Blake that I’ll be using for the new shower curtain.  That tutorial will be over on the Riley Blake blog in March.)

I went with a color called Modest Silver from Valspar and it is PERFECT.

When I went back to get the paint, I got some Liquid Nails (to fix the kick plate), painter’s tape, garbage bags (to wrap the toilet so I could paint behind it), white silicone (to adhere the frame to the mirror), spackle (I like the kind that goes on pink and turns white as it dries) and assorted cleaning supplies (because I really have no idea when that tub was last cleaned).

The other thing I want to mention about this makeover is that I did it entirely by myself…no husband help at all.  I’m not telling you this to mock him (he he he Open-mouthed smile), just so that you’ll know that YOU CAN DO THIS BY YOURSELF!

Want to see some after pictures?

(Keep in mind the shower curtain isn’t finished yet, so the fabric is just sort of draped over the rod.)

Kick plate glued back in place:

D7K_9411D7K_9413

Toilet paper holder replaced:

D7K_9200

Paint applied (and Cheetos eaten):

D7K_9197

Light fixture swapped:

photo (23)-1

Coat rack turned towel rack installed:

D7K_9198

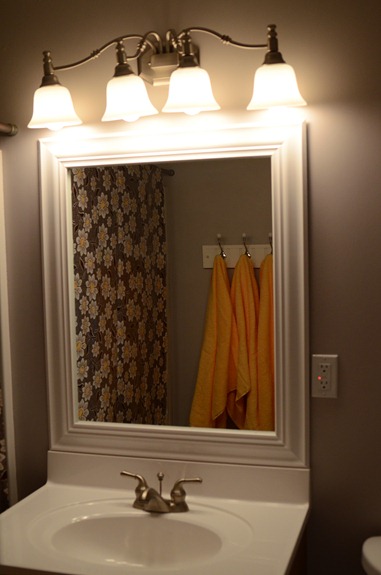
Mirror framed:

I gave everything a good scrubbing, too, and voila!  A much more pleasant bathroom!

D7K_9275

D7K_9266

Don’t forget to pick up a FREE Subscription to Lowe’s Creative Ideas Magazine:

LOWES-Creative-Magcollage1

You can also find Lowe’s Creative Ideas on Facebook.  (They’ve moved, so if you “liked” them before, you should “like” them again!)

And, now there’s a Lowe’s Creative Ideas blog.  Go have a look around.  You might recognize a face or two.

Disclosure:  Lowe’s provided me with a gift card for supplies for my bathroom makeover.

Please follow and like us:

DIY Chevron Tote + February Silhouette Promo

If you’re just here for the details on this month’s Silhouette promo, I’ll give ‘em to you up top.

blog-212

The brand new and fabulous 12”X24” cutting mat (only works with the CAMEO, not the SD) and both clean cut and sewable fabric interfacing  = $24.99.  GO HERE to pick it up and use code “CRAP” to take advantage of the savings.  Promo runs NOW through February 29th.

For some reason, my package from Silhouette include 2 packages of the sewable interfacing and none of the clean cut.  I think the name art I made with the clean cut last year would be pretty hard to top,

name art

so I was OK with coming up with a project for the other stuff.

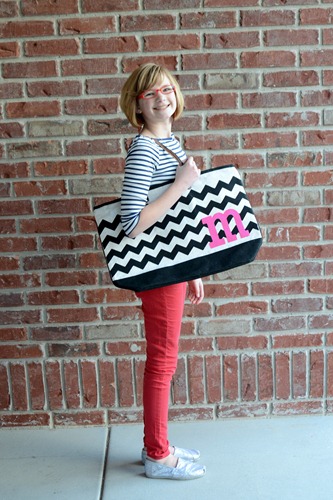
DIY Monogrammed Chevron Tote

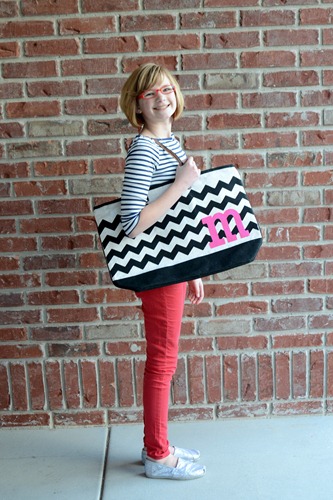
I took a plain tote from Hobby Lobby ($9.99 without a coupon, way less with), and turned it into this:

D7K_9428

Here’s a before shot of the tote:

D7K_9421

Excuse the dancing assistant.  I get what I pay for around here.

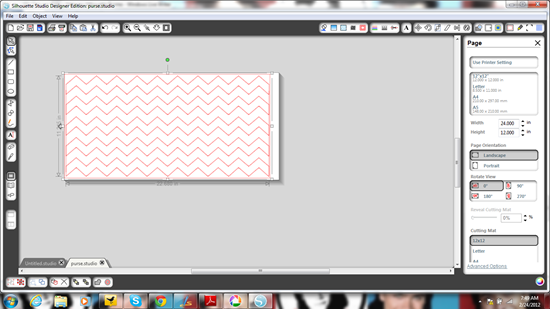
I downloaded the chevron background from the Silhouette Online Store and made it big.  Really, really big.  24” wide big.  I then ungrouped it and and removed the lines of zig zag that hung off the edges.  I moved the lines of zig zag around a little bit so that the in between spaces were the same width as the lines, and then I cut.

silhouette_chevron

This gave me 9 rows of chevron-y goodness.  I used 4 per side of the tote.

D7K_9424

I ironed them in place and then stitched them down.  I’m not gonna lie…stitching them down was a GIANT pain, mostly because the bag was already assembled and fairly rigid.  And the fabric was itchy.  If I had made the tote myself, I’d have sewed the strips down before assembling the bag.

Macy wanted the bag a little more colorful, so we added a hot pink monogram.

D7K_9428

I think a cluster of flowers would be cute, too.

I’ll be back with my Lowe’s project/bathroom reveal on Monday.  Hope your weekend is fabulous!

Please follow and like us:

I shouldn’t admit this

but last night I ran in the house to use the bathroom and my long flowy shirt got stuck in my zipper.  And I was stuck.  And I REALLY had to pee.
What was I to do?

photo (28)

Rip a hole in my shirt, apparently.

At least I didn’t pee my pants.

Please follow and like us:

Randoms

Tutorials Page

I got an email last week alerting me to the fact that it is GONE-zo.  It was a linky and I apparently did not renew my subscription (didn’t get an email alerting me that it was about to run out, so…).  It’s gone for reals.  I’m exploring other options (leave a comment if you’ve got a suggestion) and will let you know when that page is back up and functional.  In the mean time, many of my tutorials/projects can be found on my Crap I’ve Made pinboard over on Pinterest.  You can browse and click through to the pages even if you don’t have a Pinterest account.

Google Friend Connect

Google Friend Connect is going away as of March 1st for all non Blogger blogs.  I’m not sure what this means exactly.  Will it just mean that new people can’t “follow”?  Will you quit getting blog updates completely if that’s the way you’ve subscribed?  I do know this:  I am not a Blogger blog.  So, if you’ve followed or subscribed solely through GFC, you’ll need to subscribe another way.

You can find my RSS feed here.

You can have new posts emailed to you by going here.

Or, you can sit and and reload my page obsessively. Winking smile

Please follow and like us:

eShakti: A review of something I actually paid for

The 6th graders at my kids’ school have a Valentine’s Day dance.  They’re expected to dress up, and somewhere in the communicating of this information, someone said that the girls needed to wear dresses.  Because sometimes 11 year olds aren’t rational, it is easier to just go with this as opposed to trying to explain that a skirt is probably just fine as well…or so you think.  Then you start shopping.  And shopping.  And shopping.  And pretty soon you’ve been to every store in 2 malls and discovered that Juniors dresses are shorter than kid sized ones (some bordering on obscene) and that even tiny women’s sizes are way too big in the bust for a 5’3” 98lb 11 year old (as well they should be).

Enter eShakti.

I’ve seen them reviewed around blog land (my friend and neighbor Tam at Sew Dang Cute reviewed them recently), and wanted to know if they lived up to the hype, especially if you were paying for the product instead of getting a freebie.

It should be noted that there’s a $20 off for new customers on the eShakti homepage and that customizations are normally $7.50, but those were free for first timers, too.  So, I paid about $40 for what would normally be $67.50-ish.

We settled on the ruffle front poplin dress in coral.  (Random weird thing alert:  Macy wanted the turquoise one, which she had seen a few days before.  It was not there they day we ordered.  It has been back since, but it’s MIA again today.)  We ordered a size zero (based on the sizing chart measurements) and then had sleeves added and the neckline raised.  We also entered a bra size for custom sizing in that area.

We ordered on a Sunday afternoon and the dress arrived on the Monday the next week, so about 8 days later.
The result?

Feb12-1
(The actual dress color is probably a combination of the two, maybe closer to the one on the left…not my best true color photography, for sure.)

Long enough, high enough, and age/school appropriate.  Plus, pockets!

Would I order from them again?  Absolutely.  I see us becoming eShakti regulars.

What didn’t I love?  The “Live Chat” wasn’t live.  I got a response about 2 days later.  I did get a response, though.  Winking smile

Please follow and like us:

Riley Blake Designs

Are you all familiar with Riley Blake Designs?

D7K_9180

We’ve given away some of their fabric before, and based on the number of entries, I think you loved them.  Open-mouthed smile

D7K_9177

Short version:  Riley Blake is a delightful new fabric company.  And, they’ve asked me to be a part of their Project Design Team.  (Go here to check out the rest of the delightful ladies involved.)  What does this mean for you?  It means that every Wednesday, you will find a fabulous project from one of us over on the Riley Blake Designs blog.

D7K_9184

I had the opportunity to check out their warehouse and their offices on Friday…I want to move in.

D7K_9182

D7K_9178

And I’m feeling inspired, for the first time in ages.

D7K_9175

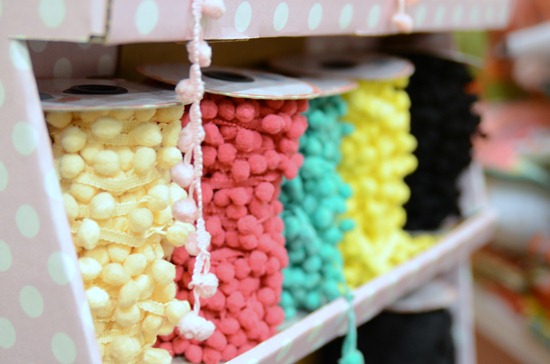
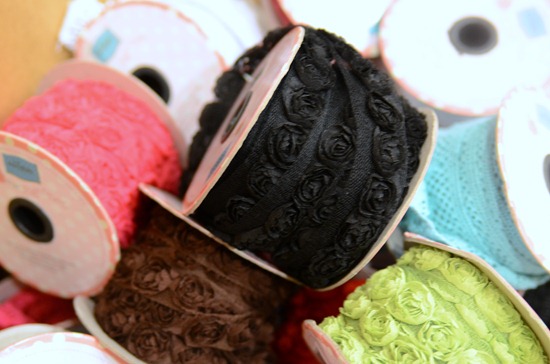
Pom pom trim can do that to a girl.

D7K_9176

Now if I could just settle on a paint color…

D7K_9185

Please follow and like us:

One Word

I shared this post originally as part of the ONE WORD series over on Less Cake {more frosting}.  I’m re-posting here, in case you missed it.

I’ve had this word selected for quite a while, even before I posted a few weeks back about quitting the business of blogging.  In fact, this word may have been what drove me to it….

D7K_8782

mend

1.  to make (something broken, worn, torn, or otherwise damaged) whole, sound, or usable by repairing.

2.  to remove or correct defects or errors in.

3.  to set right; make better;

Mend also has a sew-y connotation for me, which I love (I’m a sewing dork at heart).  I like the idea that mending is not “replacing with bigger and better and flashier”, it’s fixing what you’ve got and making it whole, sound, and usable again.  It’s admitting that what you have and who you are is good enough.  It’s a process of improvement and correction.

And so, I’m beginning to mend.

I’m beginning to mend relationships.

I’m beginning to mend habits.

I’m beginning to mend life.

If we’re keeping it real (‘cause that’s the only way I know how to be), we ALL have something that needs mending…something we want to “make better”, right?  Maybe you handled something badly with your kids or your spouse.  Maybe you haven’t called a friend you really should have.  Maybe you said something unkind.  Maybe you thought about doing a good deed and didn’t.

Now’s your chance.

Mend something.

Please follow and like us:

Rejected Valentines

(for good reason)

Jan12-4

Jan12-1

Jan12-2

Jan12-3

Please follow and like us:

NKOTB Valentine

This is part of a week-ish long series in which I’ll be sharing simple kid Valentines that can be printed as 4 X 6 photos (13 cents-ish at your local warehouse club) and then spiced up with the addition of inexpensive party supply store trinkets (25 cents or less). If you’re a new reader, check out the TOAD-ally awesome ones I did last year that inspired this series. All of my trinkets were purchased at Zurcher’s, but I’m sure you can find similar things at any party store. I usedZots 3D to adhere the toys.

OK OK OK!  This one doesn’t really fit, but I’m totally handing it out to my friends who share my affinity for Danny, Donnie, Joey, Jonathan and Jordan.

D7K_9170

Unfortunately there’s no printable…don’t want to get in trouble for that.

Which New Kid was your favorite?  Are you too young for that?  More of an N*SYNC fan?  Backstreet Boys?

Here’s where I confess that I dated a Joey look alike in high school.  Embarrassed smile

And, because someone asked and I have no shame:

SCAN0064

Hope your Thursday is fabulous!

Please follow and like us:

A-MAZE-ing Valentines

This is part of a week-ish long series in which I’ll be sharing simple kid Valentines that can be printed as 4 X 6 photos (13 cents-ish at your local warehouse club) and then spiced up with the addition of inexpensive party supply store trinkets (25 cents or less). If you’re a new reader, check out the TOAD-ally awesome ones I did last year that inspired this series. All of my trinkets were purchased at Zurcher’s, but I’m sure you can find similar things at any party store. I used Zots 3D to adhere the toys.

D7K_9126

Click on the image below to access the printable:

maze

Please follow and like us:

Creative Commons License
Crap I've Made by Char is licensed under a Creative Commons Attribution-Noncommercial-Share Alike 3.0 United States License.
Based on a work at www.crapivemade.blogspot.com.
Permissions beyond the scope of this license may be available at www.crapivemade.blogspot.com.

MyFreeCopyright.com Registered & Protected
BLOG DESIGN BY: