Sound of Music Nursery Art

If you’re here for the CAMEO giveaway, it’s one post down.

If you want to see how I made the art in the DIY Blogger House nursery, you’re in the right place.

D7K_2876

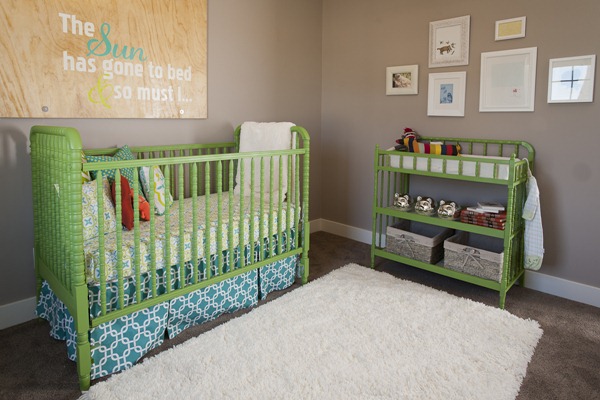
Lara of Less Cake {more frosting} and I collaborated on this nursery.  When you get a couple of Sound of Music dorks together working on a room, you’re just asking for some sort of movie reference.  And, since clothes made out of curtains don’t make sense in a room that’s not for an actual baby (or ever), artwork it was.  Winking smile

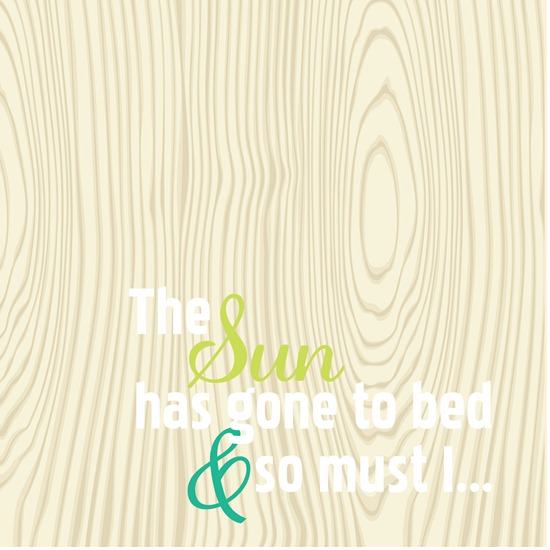
Lara showed me Copeland’s Colorful Nursery from Project Nursery and we knew we HAD to use that phrase.  And, we knew we wanted BIG.  We looked at canvases, but my signature project budget was running low.  We thought about painting it on the wall, but I was worried about a) screwing up and b) having to spend that much time in the house that last week.  So, inspired by the amazing artwork in Mandi’s entryway, we went with plywood.

I picked up this piece (4’ X 4’, thin…maybe 1/4”, pre-cut) at Lowe’s for about $14.  I went through the entire stack before settling.  I liked the movement of the grain.

photo (22)-001

Then, I took Lara a Diet Coke and she came up with a sketch/design.

Print

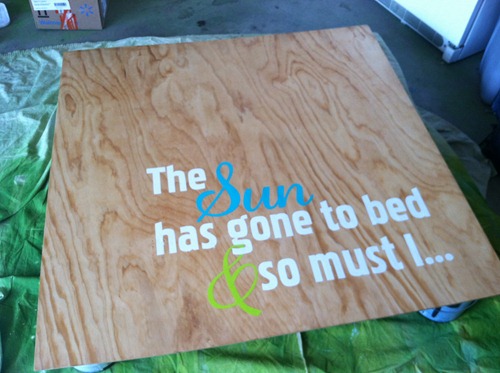
I separated the design in my Silhouette Studio software, and cut the script-y font out of vinyl using my CAMEO.  I applied the vinyl to the board and painted 2 coats using regular old cheap acrylic craft paint.  Then I peeled off the vinyl.

photo (26)

You’ll notice that I jacked up the colors.  Oops.  It still turned out awesome, right?

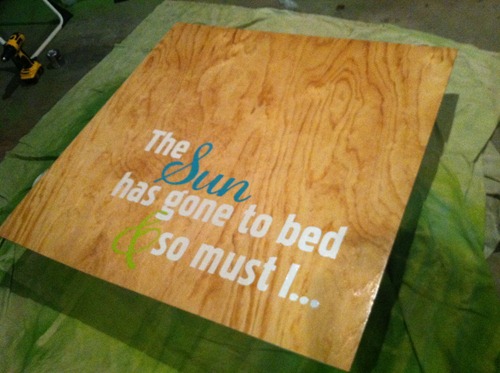
Once that was dry, I cut the print font out of vinyl with my CAMEO and applied that to the board.  The white paint needed 3 coats, but that may be due to the fact that it had been in the basement for like 5 years.

photo (31)

photo (25)

It needed just a little bit more *something*, so I went with 2 coats of a gloss poly,

photo (30)

sanding between coats (and taking awesome cell phone pics in my garage in the dark).

photo (27)

The total cost for this was right around $20.

D7K_2882

Photo by Nathan Sweet Photography

D7K_2879

And, because I love you, I’m sharing the Silhouette Studio file for your cutting pleasure.  Open-mouthed smile

Sound of Music Art

The scale is HUGE/sized for our 4’ X 4’ board but it can all be cut on 12” vinyl in your CAMEO.

Please follow and like us:

Giveaway: Silhouette CAMEO™ vinyl bundle!

Hey!  How’s it going?  I’m in Nebraska visiting family.  Yes, that drive is horrible…thanks for asking.  Open-mouthed smile

It’s time for another Silhouette promotion!  This one involves vinyl, which is probably the thing I cut most with my machine.  Check my next post for how I used vinyl as a stencil to make the Sound of Music nursery art in the DIY Blogger House, but for now here are the details on the promotion and a giveaway!

Don’t have a CAMEO yet?

augustcameo

Go here to take advantage of that deal.

augustvinyl

You can find the vinyl here.

Now onto the reason you’re all really here.  Winking smile

Want to win a CAMEO plus white vinyl, black vinyl, and transfer tape?

(I know you do!)

One lucky Crap I’ve Made reader will win her (or his) very own Silhouette CAMEO™ + vinyl bundle

TO ENTER:

Leave a comment on this post.

ADDITIONAL ENTRIES:

Follow the Silhouette blog.  Come back and leave a comment ON THIS POST (on the blog, not on Facebook or in response to your email subscription) saying that you did.

Follow Silhouette on Pinterest.  Come back and leave a comment ON THIS POST saying that you did.

***3 possible entries per person***

Giveaway is open to US residents age 18 and over only and closes Wednesday, August 29th at noon MST.  Winner will be chosen at random using a WordPress Plugin (And The Winner Is…) and notified by email.  Winner has 48 hours to respond or a new winner will be chosen.

Be sure to check back because I’ll be updating this post with other giveaways in blog land as I come across them!

Please follow and like us:

Painted Pillow + Pom Poms

Say that 5 times fast.

D7K_2884

The nursery in the DIY Blogger House was inspired by this fabric

DC3896_White

by Patty Young.  (She is DELIGHTFUL.  I took a class from her last year at The Creative Connection and it was for sure one of the highlights of my trip.)  It’s Moorish Tile in white from her Andalucia collection for Michael Miller.

I picked up a bunch of awesome fabrics from Fabric.com.  (I’m not affiliated with them in anyway, just letting you know where I got my stuff.)  They have an awesome feature on their site where you can add fabrics to an inspiration board to see them all together before you make your purchase.  I built on the colors in the Moorish Tile fabric and came up with this:

nurseryfabrics

I didn’t end up using all of the fabrics on the board, but it was my online version of stacking a million bolts in my cart before I make a final decision at my local fabric store.  Winking smile

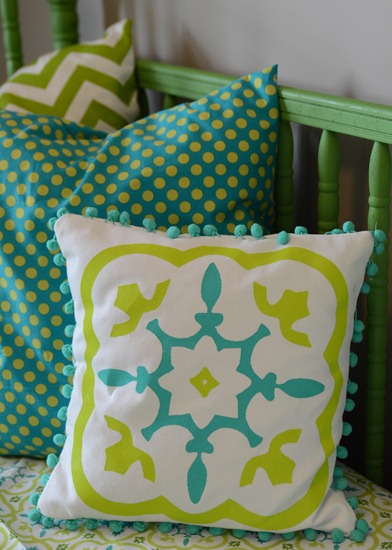
I made pillows out of the Michael Miller Ta Dot Lagoon and the Premier Prints Zig Zag Chartreuse, but I wanted something unique for the other pillow.  I decided to enlarge part of the design in the Moorish Tile pattern and paint a pillow.

Because I’m not that coordinated, I cut a freezer paper stencil.

Because I’m lazy, I used my CAMEO.

I showed you last week how to trace a design using your Silhouette.  That’s where I started.  I traced the image of the fabric, but then I had to make a couple of modifications.  My trace of the design looked like this:

Fullscreen capture 862012 74715 PM

That’s absolutely fine, but I wanted it cleaner and with less stuff around the edges.  I wanted to focus on the center part.  So, I made the trace bigger (click and drag on the corner) and rotated it the direction I wanted it to be (the green dot at the top of the design allows you to rotate).  Then I right clicked and selected “Release Compound Path”.

Fullscreen capture 862012 74743 PM

This makes the image a bunch of separate cuts and lets you delete the floater pieces that you don’t want.  I deleted all the floaters and was left with this:

Fullscreen capture 862012 74844 PM

Getting closer!  I opened my Eraser menu after that (over on the left, under the add text button) and erased the parts of the design that I didn’t want.

Fullscreen capture 862012 75210 PM

At this point I would recommend selecting the entire design and right clicking and then selecting “Group”.  This way your whole image sticks together and stays the same size.

Now I just needed to fill in the missing pieces.  I used the “Draw Freehand” option to do that.  It’s right above the add text button.  You can see it highlighted in the image above, but it’s tiny.

Draw in one of the missing lines.  It doesn’t have to be great.  Mine started out like this:

Fullscreen capture 862012 75316 PM

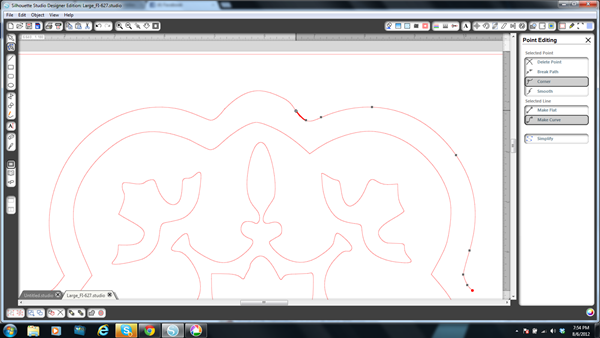
If you double click on the line you just drew, it will bring up the point editing menu.

Fullscreen capture 862012 75441 PM

It will allow you to maneuver the end points of the line you drew over onto the lines in the design as well as modify the curves.  Just play with it a little!  And, if you screw up, use the undo function and try again.  Once you’ve got it how you like it, select the whole design and right click and select “Group” again.

Fullscreen capture 862012 75606 PM

Repeat for the other 3 sides.

Fullscreen capture 862012 80545 PM

Nice, right?  I had a 14” pillow form, so I wanted this design as close to 12 X 12 as possible.  I stretched it all the way to the edges of the cut area.

To cut freezer paper with your Silhouette, put the shiny side up and reverse your image (if necessary…it wasn’t really necessary on this).  Choose the normal paper settings and then slow it down just a little.

I ironed the design to some white cotton duck that I had on hand and then filled it in with craft paint mixed with a textile medium (so it doesn’t get crispy or crack).  The paint colors I used were Granny Smith from Martha Stewart Crafts and Ocean Breeze from Craft Smart.  They were picked strictly for how well they matched the Moorish Tile.

And the finishing touch?  Some pom pom trim from our friends over at Pick Your Plum.

D7K_2883

I kind of love it.

I bought the 2 bottles of craft paint for this project and our designer Brian provided me with the pillow form ($1.99 from IKEA) but I had everything else on hand.  I think this is a great inexpensive way to add a custom one-of-a-kind pillow to your space.

Please follow and like us:

How to trace with your Silhouette

I had a comment on the football helmet pillow post asking how to trace in the Silhouette Studio software, so I thought I’d do a quick tutorial.  It’s SUPER easy and it will change your life.  OK, not really, but it’s still pretty cool.

I have the Designer Edition software, but you can do this in the regular version as well.  Just wanted you to know why some things might look a little different on my screen than on yours.

The first thing you need to do is find the image you want to trace.  Save it to your computer.  You can trace anything, but blocky graphic type things work best.  (Next week I’ll be showing you how I traced  some fabric and enlarged the motif to make a painted pillow.)  For purposes of this example, we’re going with the local high school logo.

Go to the "File” menu in the upper left hand corner and choose “Open”.

Fullscreen capture 7312012 81517 AM

The box that comes up with default to Silhouette Studio files only. This will not help you.  Open-mouthed smile  You need to go to the box at the bottom and select all files.

Fullscreen capture 7312012 81504 AM

Find your image and select it and then open the trace menu (indicated by the poorly drawn red circle in the image below).

Fullscreen capture 7312012 80656 AM.bmp

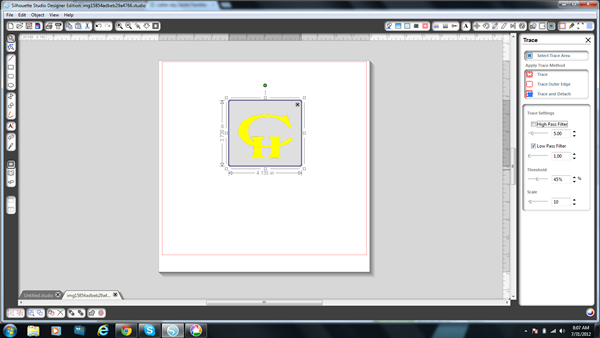
Next you’ll want to “Select Trace Area” (the top option on the trace menu).  This allows you to draw a grey shaded box around the portion of your image you want to trace.  If you want to trace the whole thing, you don’t have to be especially careful.

Fullscreen capture 7312012 80722 AM

Parts of the image will turn yellow.  This will be the part that is traced.  Mess around with the sliders until everything you want traced is yellow.  On a blocky black and white image, I have the best luck with clicking the “Low Pass Filter” box and unclicking the “High Pass Filter”.

Fullscreen capture 7312012 80743 AM

Click “Trace” up near the top, and you’re done!

Fullscreen capture 7302012 92325 PM

You can then move and delete the original image and resize/modify your trace as necessary.

Easy, right?

Please follow and like us:

Vinyl Labels

If you’re here to win the Silhouette CAMEO™, go here.

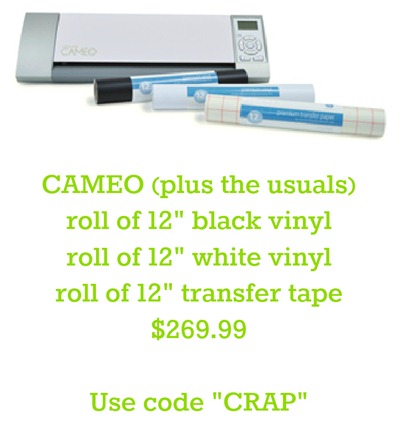
If you’re here to buy a CAMEO + 2 rolls of vinyl and transfer tape for $269.99, go here and use code “CRAP”.

If you’re here to get 40% off any and all Silhouette vinyl, go here and use code “CRAP”.

To see two other projects I made with the vinyl Silhouette sent me this month, check out my Mother’s Day sign and my DIY Vintage sign tutorials.

April12

So, I mentioned yesterday in the glitter glasses post that we are huge fans of Zenni Optical.  Macy recently started wearing glasses and was sorely disappointed in the color selection at the eye doctor.  I was sorely disappointed in the pricing.  So, we gave Zenni a try.  We were extremely happy and have since placed another order.  Or two.

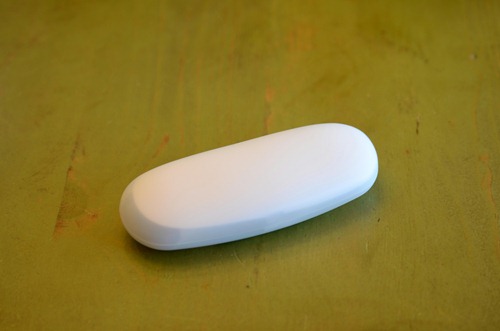
The one thing we don’t love about Zenni?  All the cases come like this,

D7K_1374

which is fine if you only have a pair or two.  But when you have 11?  (Did I just admit that?)You are frantically opening case after case after case in search of the orange glasses and you needed to leave for orchestra 2 minutes ago.

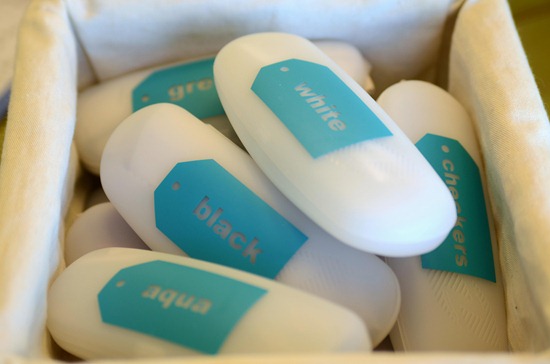
So, I sat down with my Silhouette Studio® Designer Edition software (you could totally do this in the regular version, to) and made some labels.

Fullscreen capture 4282012 10652 PM

And now?

D7K_1379

***I am not affiliated with Zenni Optical in any way.  They made my new glasses wearer much happier about wearing glasses.  And that makes me happy.***

And, because several people have asked, we upgrade to poly-carbonate lenses and anti-glare coating, which adds about $15/pair.  Sometimes they have buy 2 get one free sales.  The bottom line for me is that 11 pairs of glasses from Zenni = less than one pair from the eye doctor.

Please follow and like us:

Giveaway: Silhouette CAMEO™ + current promotion

First of all, here’s the promotion if you don’t think you’re going to win:

CAMEO-flower

+

1 roll 12-inch Black Premium Vinyl

1 roll 12-inch White Premium Vinyl

1 roll 12-inch Transfer Paper

=

$269.99

Go here to add the bundle to your cart and use code “CRAP” to take advantage of the savings.  This promo runs through May 16th.

If you already have a Silhouette, you can get 40% off all vinyl using the same link and code “CRAP”!

WANT TO TAKE YOUR CHANCES AND TRY TO WIN ONE?  HERE’S WHAT COULD BE IN IT FOR YOU:

One lucky Crap I’ve Made reader will win her (or his) very own Silhouette CAMEO™

TO ENTER:

Leave a comment on this post.

ADDITIONAL ENTRIES:

Follow the Silhouette blog.  Come back and leave a comment ON THIS POST (on the blog, not on Facebook or in response to your email subscription) saying that you did.

Follow Silhouette on Pinterest.  Come back and leave a comment ON THIS POST saying that you did.

***3 possible entries per person***

Giveaway is open to US residents age 18 and over only and closes Monday, May 14th at noon MST.  Winner will be chosen at random using a WordPress Plugin (And The Winner Is…) and notified by email.  Winner has 48 hours to respond or a new winner will be chosen.

I’ve already showed you one of the things I made with the roll of vinyl Silhouette sent me this month:

D7K_0290
Vintage sign tutorial here.

I’ll have my latest vinyl project for you tomorrow.  I’ll also be updating this post with links to the other giveaways going on in blog land as I become aware of them, so be sure to check back!

Infarrantly Creative

Skip to My Lou

Crap I’ve Made

I Heart Naptime

House of Hepworths

Craftaholics Anonymous

Please follow and like us:

“Vintage” Sign Tutorial

Do you love the look of old metal signs?

I do.

Do you love the price of old metal signs?

I do not.

Plus, what are the odds that it’ll be just the right size and color?  Not good, friends…not good.

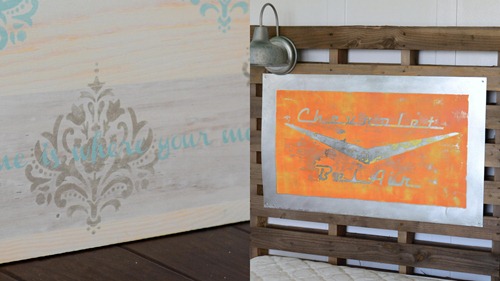
vintage_chevy_sign

So, when I had the idea to put one on Macy’s pallet headboard, I knew I’d have to DIY it.

My first stop was the ducting section at Lowe’s.

photo (45)-001

They sell metal sheets elsewhere in the store (near the plexi glass), but they’re about 2-3 times as much.  Is it “nicer” metal?  Probably, but we don’t need nice for this project. Open-mouthed smile

The sheet measured 24” X 36”, but I wanted a slightly different size.  I cut about 2.5” off one of the long sides so my piece was 21.5” X 36”. You can score with a razor blade/utility knife and then snap the metal along the line, but it takes some SERIOUS patience and massive amounts of scoring.  I went the quick route and used tin snips (WEAR GLOVES) and then used a file to smooth the edge (WEAR GLOVES).

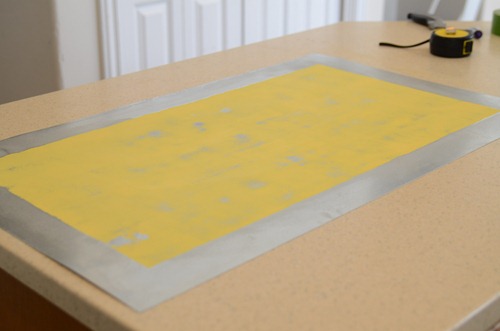
I liked the look of a metal border, so I taped off the edges and then I applied some yellow paint.  I used Jonquil from the new Martha Stewart Crafts by Plaid line.  That paint works on pretty much any surface, including metal.  You don’t need a great coat, because you’re going to sand it and beat it up.  Make sure it’s mostly covered, though.  Peel off the tape and sand.  I used an electric sander with 220 grit.  If you’re doing it by hand, you could use rougher paper (lower grit #).  Here’s a shot after I had sanded:

D7K_0270

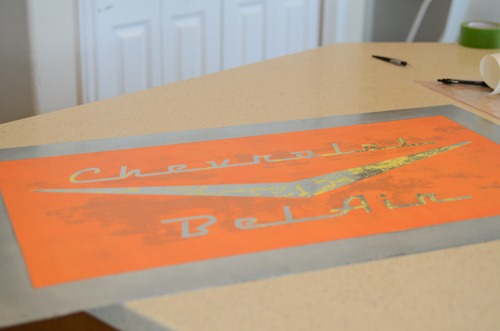
I put the tape back on and applied some vinyl, cut with my Silhouette CAMEO™, in the center in the shape of a vintage Chevrolet logo.

Fullscreen capture 4272012 20519 PM

I traced the center part manually in the Silhouette Studio® Designer Edition software and then used the font “Hood Ornament” to add the lettering.  It’s not quite the same font that Chevy actually used, but only true car dorks would know that.

Once the vinyl was applied, I put on a coat of Martha Stewart Crafts by Plaid paint in carrot.

D7K_0275

After I peeled off the tape and vinyl:

D7K_0279

And then I sanded some more.  Once I was happy with it, I mounted it to the headboard with a screw in each corner.

D7K_0290

I will probably go back and put a clear coat on it, but it’s cold today and I’m a wuss.  Open-mouthed smile

April12-004

Please follow and like us:

Math, Lady Gaga Style + download

Little known secret:  Macy is a math nerd.

Like, (proud mom brag alert) she’s taking 8th grade honors math next year and skipping the whole 7th grade math scene completely.

And, last Thursday, she participated in the Math Olympics.

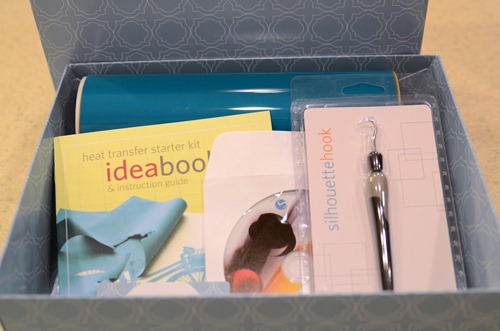
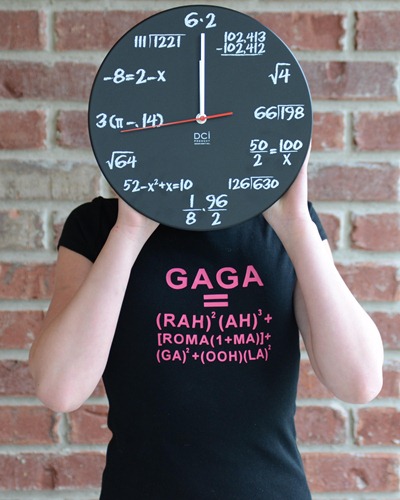
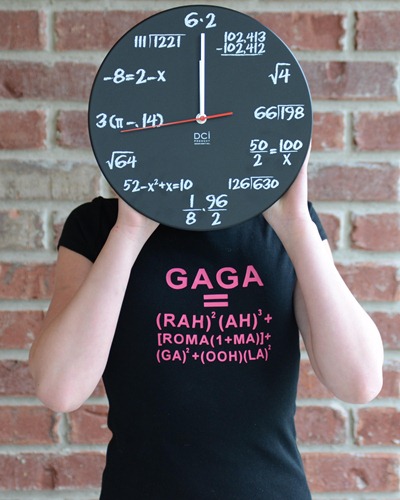
The plan was for her to wear a dorky math related t-shirt.  So, after much Google-ing and debate (“5 out of 4 people don’t understand fractions”, “No, I will not do your math”, etc.), we made one with my Silhouette CAMEO™ and a heat transfer starter kit.

D7K_9703

If you haven’t tried the heat transfer yet, you really should…you’ll be hooked.  The hilarious t-shirt possibilities alone make it worth your while.  (Remember when I made myself one that said “WORST MOM EVER”?  He he he.)

What did we decide on?

D7K_9738

The font I used is Arial.  The font size is different on each line.

D7K_9735

To save you some work, I’ve uploaded it for you hereDon’t forget to reverse the image before cutting it out of heat transfer!

When it came right down to it, she wussed out

D7K_9707

and wore something completely normal instead.

D7K_9715

I said the OUTFIT was completely normal.  She, obviously, is not (takes after her mother).  Winking smile

In case you forgot, I’m giving away a CAMEO and a heat transfer starter kit.  Go here to enter.

If you’re not feeling like a winner, you can pick up a Silhouette CAMEO™ PLUS a heat transfer starter kit for $269.99 through April 10th.  Go here to add the bundle to your cart and use code “CRAP” to take advantage of the savings.  Already have a Silhouette?  Pick up the heat transfer starter kit for $24.99 or take 40% off of all other heat transfer material.  Use code “CRAP” for that as well!

Please follow and like us:

Giveaway: Silhouette CAMEO™ + current promotion

OH YEAH!

Way to get the week/month started off awesome, right?

First of all, here’s the promotion if you don’t think you’re going to win:

CAMEO-flower

+

KIT-HEAT-TRANS

=

$269.99

Go here to add the bundle to your cart and use code “CRAP” to take advantage of the savings.  This promo runs through April 10th.

If you already have a Silhouette, you can get the heat transfer starter kit for $24.99 and/or take 40% off of all other heat transfer material using the same link and code “CRAP”!

WANT TO TAKE YOUR CHANCES AND TRY TO WIN ONE?  HERE’S WHAT COULD BE IN IT FOR YOU:

One lucky Crap I’ve Made reader will win her (or his) very own Silhouette CAMEO™ PLUS a heat transfer starter kit!

TO ENTER:

Leave a comment on this post.

ADDITIONAL ENTRIES:

Follow the Silhouette blog.  Come back and leave a comment ON THIS POST (on the blog, not on Facebook or in response to your email subscription) saying that you did.

Follow Silhouette on Pinterest.  Come back and leave a comment ON THIS POST saying that you did.

***3 possible entries per person***

Giveaway is open to US residents age 18 and over only and closes Sunday, April 8th at noon MST.  Winner will be chosen at random using a WordPress Plugin (And The Winner Is…) and notified by email.  Winner has 48 hours to respond or a new winner will be chosen.

Want to see what I made?

D7K_9735

I’ll have the details for you tomorrow (plus a free download if you want to make it yourself).  I’ll also be updating this post with links to the other giveaways going on in blog land as I become aware of them, so be sure to check back!

Infarrantly Creative

I Heart Naptime

The Idea Room

Crafting Chicks

Whipperberry

Craftaholics Anonymous

UCreate

Eighteen25

SugarDoodle

House of Hepworths

Please follow and like us:

How To Paint a Mailbox

(Or at least how to make it polka dotted)

I promised the how to on the paint job from the mailbox I used in yesterday’s post, so, without further ado…

polka_dot_mailbox

The first thing you’ll want to do is remove the flag from the mailbox.  Mine had a nice little pin to pull out and the flag came right off.

D7K_9637

Next you need dots.  Lots and lots of dots.  I used vinyl and cut them with my Silhouette CAMEO™ and my Silhouette Studio® Designer Edition software, but you could easily trace and cut them by hand or even use a large punch.  Because I bought an oversized mailbox, I wanted my circles big…1.5”.  I made one and then used Object > Replicate > Fill page in my software to fill my vinyl.  A 9” by 24” piece gave me enough 1.5 dots for my whole mailbox.

Fullscreen capture 3202012 83715 AM

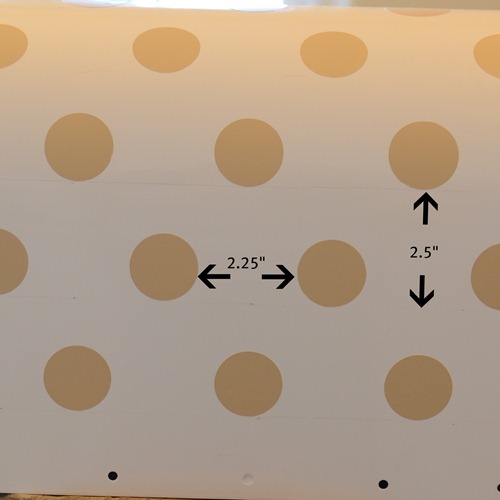
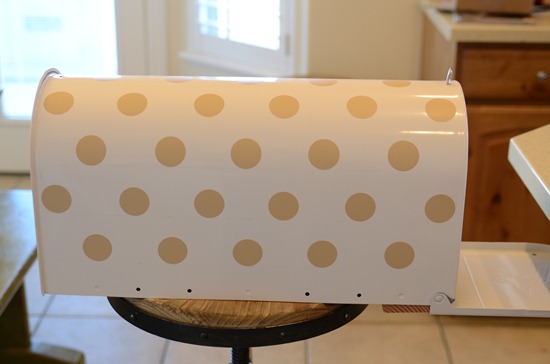
I drew a pencil line down the top of my mailbox and found the center.  I placed my first dot there.  I then spaced the dots 2 1/4” apart (from edge to edge) along the top of the box.

To make the next row, I drew a line 2 1/2” from the bottom edge of the dots and placed the bottom of the next row right up next to that line.

D7K_9559-1

I centered a row of dots down the front and back of the mailbox with the same spacing, and then filled in the ends the same way.

D7K_9560

Once all the dots were in place, I had a kid run her finger around all the edges to make sure that the vinyl was sealed tightly.  Then, I headed for the garage with a can of Valspar Gloss Exotic Sea.  (Random side note:  I’m enjoying the new Valspar spray paint cans immensely.  The big old trigger button makes the painting much more comfortable.)

D7K_9640

My favorite “duh” spray painting tip is to always start with your item upside down.  Get all the bottom edges painted nicely first.  I gave the whole mailbox a couple of coats and then peeled off the vinyl.  I used the hook tool from Silhouette, but again…not necessary.

Put the flag back on and you’re good to go (chains and bird perches optional)!  I’m totally wishing my mailbox wasn’t brick right about now.

polka_dot_mailbox1

Check back tomorrow for a seriously awesome deal on the Silhouette CAMEO™ and the Silhouette Studio® Designer Edition software.

Please follow and like us:

Creative Commons License
Crap I've Made by Char is licensed under a Creative Commons Attribution-Noncommercial-Share Alike 3.0 United States License.
Based on a work at www.crapivemade.blogspot.com.
Permissions beyond the scope of this license may be available at www.crapivemade.blogspot.com.

MyFreeCopyright.com Registered & Protected
BLOG DESIGN BY: